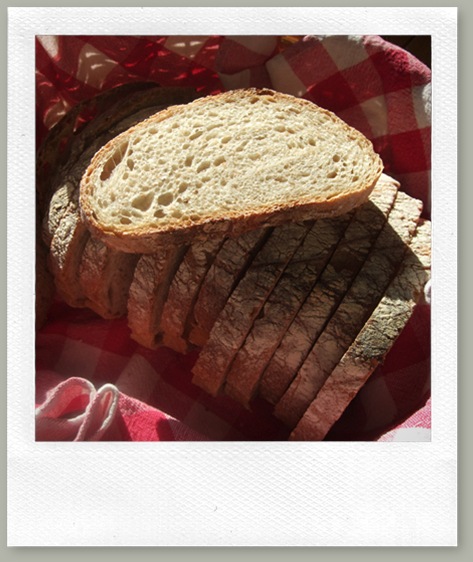
 Turkish Flatbread…Now if only I had some Doener Meat!
The second bread I baked is also from Nick Malgieri’s book “The modern Baker”. This one takes a little longer to make about 2 1/2 hours or a little less.
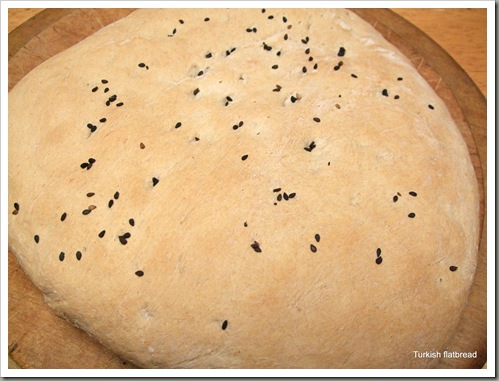 I loved working with this dough. It felt amazing and was so easy to work with and I did not need any extra flour.
 Again I did not use the kitchen machine for this one (mine is 220V and I am waiting for the step down transformer to arrive).
The shape of this flatbread was the typical round and the dimpled look brought me right back to the Middle East. To hold on to that fleeing moment I topped mine with nigella seeds.
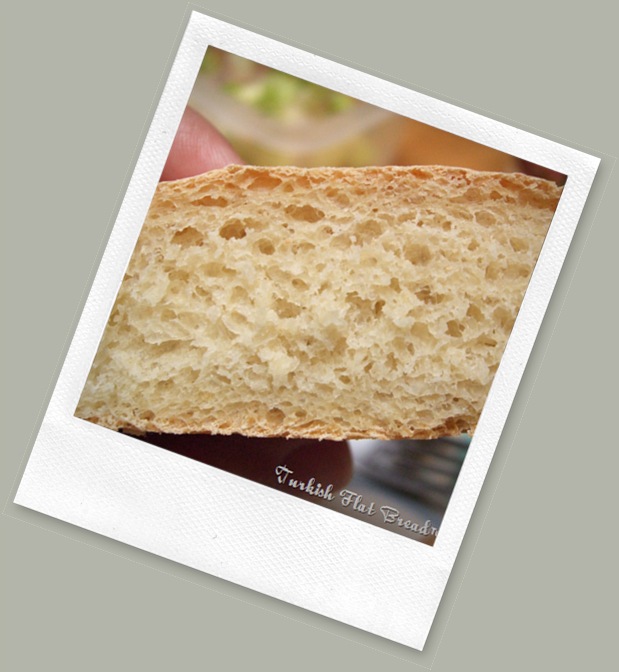
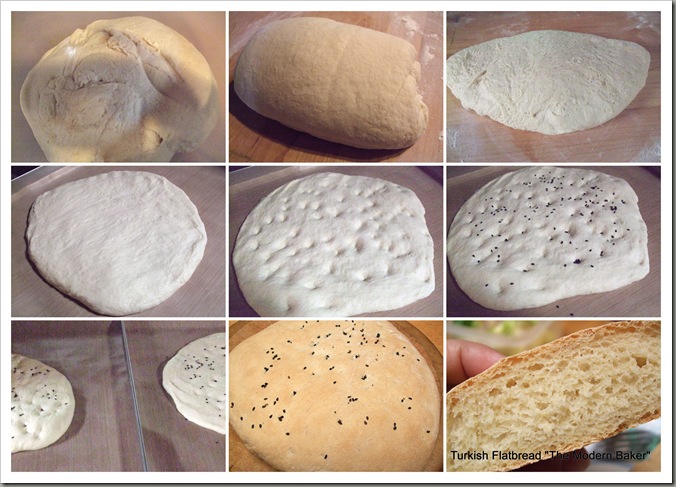 Nice bread but not quite what I am used too for Turkish bread.
  Since returning to the states I have not baked with spelt because I have yet to locate a source for it. Does anyone know where I can purchase a sack of whole grains (I will grind it myself) for a reasonable shipping rate?
 I am back!….. in the kitchen that is
Finally moved in. Well sort of anyhow. I think it will be a while before we are really settled and things are the way I would like them to be.
This is day 17 of our move here and my husband is already on his 2nd weeklong trip.
The first one started on day 3! It took the moving company two whole days to unload our belongings and on day 3 the day we start to unpack for real because our furniture is finally standing he has to leave.
Thursday he received a call that he is needed in Alaska of all places (sure will be a cool down from the 100+ here) the very next day.
That guy is such a trooper and knowing how much the lock situation of the house bothered me (we had gazillion locks and each using another key, one lock even used a key inside! The main exit often refused to open.) he changed 2 sets of doors (that is a dead bold and handle on the rod iron door and a lock which needed a new drilling on the inside door) so now I don’t have to be afraid of being locked out or experience nightmares of being locked inside during an emergency.
This is one reason we did not take the house we originally wanted. It was a fixer upper with so much potential but it would have been a nightmare with him gone all the time (we found out after arriving here that he will be gone a lot). This one too will need some changes and even his assist to hang up pictures on the wall (the whole house is paneled with wood that is so hard it’s pretty much impossible for me to put a nail into).
We live in a small town outside of El Paso which is about a 30 minute drive away and therefore I am not going shopping every day like I was used to in Germany. I have to think ahead of what I will be needing and get the shopping done when I am in town.
We are pretty much spoiled and prefer organically grown food which is a whole other problem here in El Paso and that is not just price wise. I have not found an egg source here and was in for a sticker shock for organic eggs (over $ 4). I already knew the crazy price of milk here and it baffles me. In Germany organic or not is very close in price. I paid between 20-23 cents an egg depending on the Euro (I got mine from a neighboring farm), here it’s 35 cents! For half a gallon of milk I paid between $ 2-2.05 in the store here it’s more than double that. Can someone explain to me why?
Being back in the USA also means I will be doing all my daily bread baking because well… I am German and like my bread with crust.
The first bread I baked in the oven here (a gas oven which will need getting used too, can’t wait until the step down transformer gets here so I can use my trusted old/ fairly new friend again) is from “The Modern Baker” and happens to be also the very last bread I baked in Germany. What a neat way to start my baking here having ended on the same note.
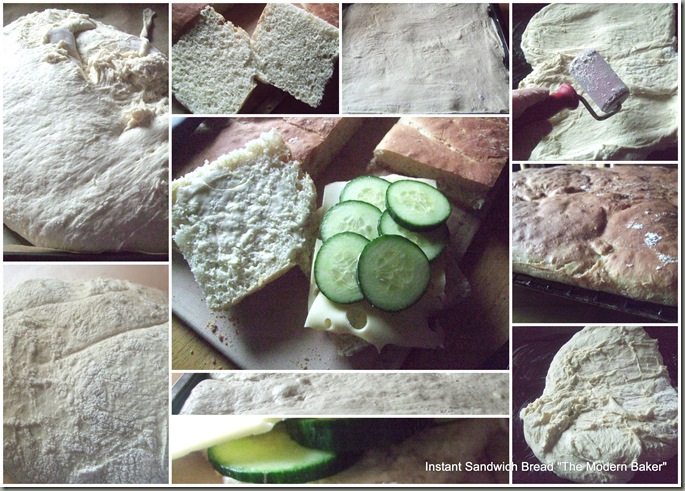
This bread is baked rectangular on a sheet rather than in a round. The first time I made this I read the instructions over and over thinking I must be missing something. I have never made a bread before that I had to roll or push onto a baking sheet.
I have to bring up that I don’t use active dry yeast since I always have instant dry yeast on hand. The price on this was a nice surprise.
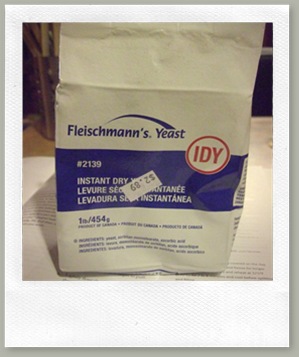 I found it in a small Mexican grocery store in Fabens, TX for just $ 2.89 a pound! That is about half of what I used to pay ordering it from King Arthur. After I open the bag I put it in a big jar and keep it in the fridge.
Nick Malgieri uses “active dry” for his breads. He does not even mention the option of Instant dry that makes me believe that it was not yet on the market when he wrote this book. To convert one yeast type to another gaaarp wrote up this conversion chart. Thank you Gaaarp!

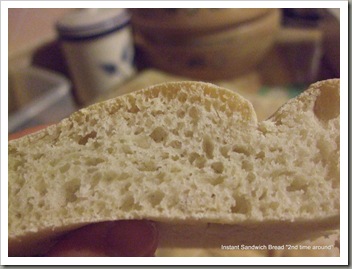
I did not notice any difference in the dough. I however did notice a difference in how it baked from one oven to the next. I prefer the first version though the second was just as good.
And there you have it “Instant Sandwich Bread”! I cut those into squares for sandwiches or morning toast (this bread tastes delicious toasted). If you have not baked this bread yet go ahead and give it a try. It’s very easy to make (great news for beginners) and takes less than two hours from start to finish.
NOTE: This bread tastes best the day it’s baked or the next morning toasted. So only bake enough to eat right away or freeze the rest like mentioned in the book.
 Still in Limbo
Nevertheless, we are back and we have also settle on a house. That is why we are on vacation in Nebraska at this time.
Our future home is still occupied and the present owners are taking the time we are gone to move out so we can close on this home 7/22 and move in 7/23. Wow, I can't believe it, we are indeed back and will soon call a home our own again.
If you are familiar with El Paso you will know that it is located in the midst of a desert (If you are not check the link above). One thing I missed the most living here the two times prior (yup, this is our third time in the sun city) is GREEN!
What do you think we found on the outskirts of the city in a suburb? A little half acre oasis with flowers, roses, grass and lots of fruit trees . We are buying this home and it's the first time we are buying a home not for it's house but for the yard (don't laugh to hard).
It is able to stay that green in the middle of a desert because of it's close location to the Rio Grande and the irrigation canal that leads to the lot. We will have irrigation rights to flood the yard every two weeks which will be something completely new to us as well.
We are very much looking forward to be settled again. Now you know how I am spending my summer, would love to hear about your summer and what you have been up too.
Until we
Petra
 I survived!
the packing that is. What should have been a rather simple three day “pack out” turned into a 6 day night mare. That nightmare started last Wednesday and ended with us turning over the house on Tuesday afternoon.
Thankfully it’s all done now until our goods are delivered ones we get to the states and have actually purchased a home.
That search might be coming to an end. If so it would be the first time for us to purchase a home online sort of speak. Had a friend in El Paso checking out some of the houses we earmarked (thank you so much Daniel D.) and one I fell in love with (well if you can do that sort of thing with a house) after seeing the pictures our friend made at the visit.
It will need some cosmetic work (has a lot of old time charm and so much character, that character would translate into WORK). We have a realtor get in touch with the seller to get it inspected by a professional to see what else might be lurking under those “cosmetic” faults.
Much of our search was done via zillow.com which has a great tool to see the property from all sites. That way you have some sort of understanding what is on the property. Trulia and realestateyahoo.com are some other sites we used to cross reference those properties. That’s pretty much all we could do being so far away.
So now that I am situated in a Hotel for the next two plus weeks I thought I would bake a little. Thought that is because our move into the hotel held another glitch. The room with kitchen was not available until Sunday. So we ended up moving into a suit which worked out quite well. It has two rooms so our 15 year old has a place to kick back and sleep without his parents. Which of course raises all of our moods despite the rainy cold weather we have been getting. It’s barely 12C today. Way to cold I say. Double that expected for this weekend so we will be enjoying the high 70’s for a few days (keeping my fingers crossed that the weather frogs got that one right).
So no baking yet but my husband has a toaster oven thingy in his office so I am actually going to see what I can produce with that one after he brings it over here. Wish me luck because I so need something to do.
Until then I wish you all Happy baking!
PS: HBin5 – sorry no bread braid this time around
 Whole Wheat Currant Bread
and we have a winner…..Nick Malgieri has done it again. Whole Wheat Currant Bread will get you to that finish line.
The book I am baking from is The Modern Baker and one quick bread after another is a jewel on it’s own. Each and everyone I have baked so far has been enjoyed and devoured. Just the quick bread section was worth the price of the book to me.
This bread has great ingredients and one that caught my attention right away was the use of whole wheat. I love whole wheat and use it a lot but I would have thought that in a quick bread the baked good would turn out rather dense. Not in this case. Not one bit dense. This is great bread.
I used only half of the currants since that’s all I had but it was plenty enough. Great bread, great taste, a winner in my book.
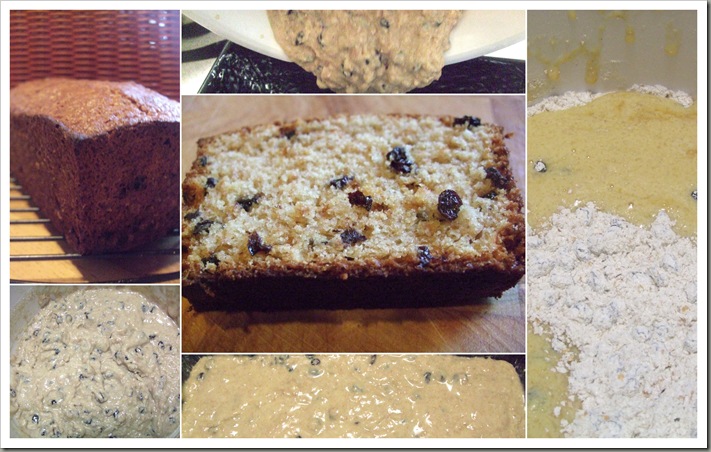 Now get that apron, get out those measuring cups and lets bake some Whole wheat currant bread!
You got the book right? This is one recipe I could not find online so I don’t have a recipe to direct you too. This is so good that if you have been waiting for the right time to get that book now is that time.
Until we bake again….see ‘ya!
If you have a moment why not check out what the other bakers are doing over at The Modern Baker Challenge.
PS: I think the whey leftover from making the Lemon-bag-cheese would be a great addition in these quick breads instead of the buttermilk. I will give that a try after we are settled into our new home
 Lemon Bag cheese stuffed Ravioli

I must say I am so very pleased with how they turned out and my husband proclaimed them the best cheese Ravioli he has ever had. Success!
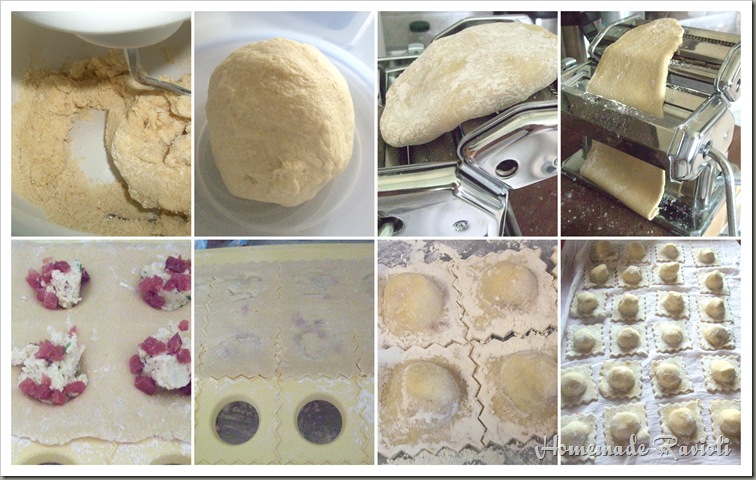 This was my first time making Ravioli with this little tool (Big Snack Combo from Tupperware). Actually my first time making Ravioli ever. I have made Maultaschen (a “Schwabian” type of Ravioli) before especially when we live away from Germany but not Ravioli with a cheese filling.
 It’s rather easy I found especially with the aid of a Pasta machine. I make the dough than let the dough rest for a while (20-30 min.). To roll out the dough I start with Setting one on the pasta machine and work my way up to 4. I stopped at 4 for these Ravioli and it turned out perfect.
Next I floured my mold and covered it with pasta dough. My machine is not wide enough to cover the whole mold (12 Ravioli) so I made them in batches of 8 each.
I used the same filling from the dumplings I had yesterday. Still had enough left over to make 24 Raviolis and 8 not so pretty ones (forgot to cover the mold with flour). Just enough for dinner for the 3 of us and some lunch with the not so pretty ones.
I added some bit’s of “Katenschinken” (smoked cottage ham), covered this with another sheet of pasta dough.
The ravioli form I use has a wavy line around the “to be” ravioli that is raised. So all you have to do now is roll over the form with a rolling pin, turn the form around and the finished ravioli will drop into the container you place underneath.
Voila, that’s it. What I do when making pasta is this. I cover the pasta with flour to prevent from sticking. I then place them on a tea towel and cover them with another. Now I let them dry for a little. I found that homemade noodles cook up better (better bite) if they have the chance to dry for a while. You certainly can cook them right away though.
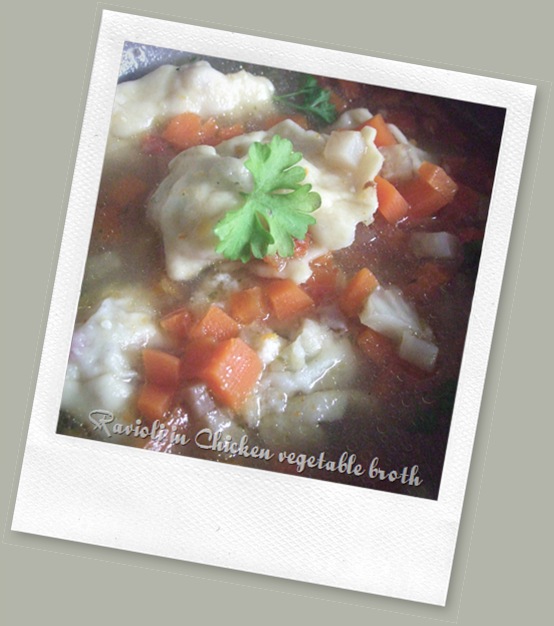
For lunch I used some homemade chicken broth (this one was from a half cooked chicken which will be dinner today in some enchiladas) with some of my homemade vegetable seasoning, diced carrots and celeriac and some of the first batch of Ravioli that did not turn out quite so pretty (did not flour the mold and that was a mistake) but tasty nevertheless. That was all I needed. It was that good.
Recipe:
Pasta Dough
makes 32 Raviolis (3-4 people depending on what else you serve)
200g Flour (AP)
50g Semolina (Durum) flour
2 eggs
a little salt
enough cold water (1-2T) to make a stiff pasta dough
Mix flour, semolina, salt and eggs and add only enough water (depending on the size of your eggs and the flour you use you might need none or very little) to create a stiff dough. Let rest for 20-30 minutes.
Filling
Ricotta or Lemon cheese bag filling from yesterday
Some smoked cottage ham or cooked bacon bit’s
Sauce
(makes enough for 24 Ravioli)
200 ml cream
cornstarch or flour to thicken
chicken broth
seasoning
More smoked cottage ham or cooked bacon bits
Ramsons (bear leek)
Heat cream add some chicken broth (1/2c or more depending on how much sauce you need, the broth with also aid in the flavor of the sauce so don’t skip this), season with homemade vegetable seasoning or your own seasonings (cubes, salt, pepper etc.). Thicken with cornstarch or flour. Add some Ramsons to your sauce just before serving.
I served these Ravioli with a Chicken vegetable broth and a salad w/feta. 4 Ravioli where enough for me. My husband and son ate 8 each.

PS: If you live in Germany and really don’t want to make your own Pasta dough you can find dough in some Bakeries or your local grocery store. This might be the case in other countries too.
 Lemon Bag cheese Dumplings in Broth
I turned them into dumplings and had them for lunch in a broth.
Let’s get to the broth first.
When you roast or cook chicken don’t ever throw away the carcass, bones, neck or insides of that chicken. You can make some fantastic broth out of it. You don’t have to do it right away either. You can freeze all those bit's and pieces and cook one when it’s convenient for you.
I have been telling you that I am cleaning out my freezer so today I got out the remaining bags of those chicken bit's and pieces and made some broth. Here is how I do it.
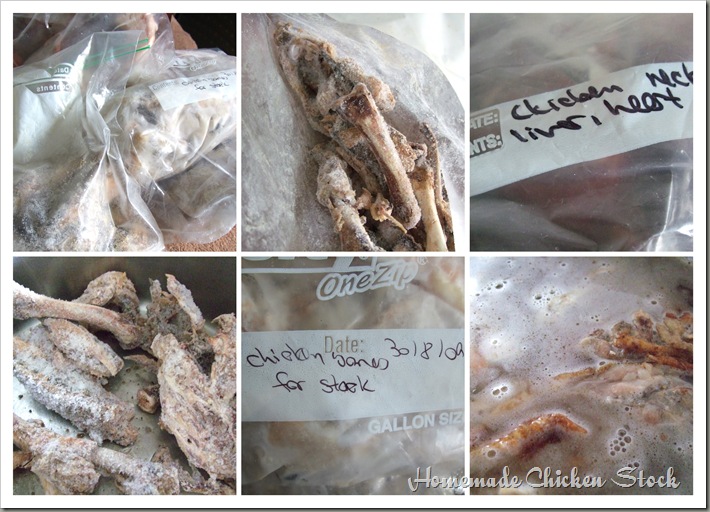 In this picture you see three different bags. One has a chicken carcass (leftover from a roasted chicken), one has different chicken bones from former meals and the other had the neck and innards from another chicken in it. I dump it all into a big pot and fill it with water. Bring it to a boil, lower the heat and simmer for hours and hours (Great project for a crock pot over night). Depending on what I want to use the broth for I often add all sorts of veggies to it right away too (leeks, celeriac, carrots, leeks etc.). That’s it, see how easy it is to make a great chicken stock?
Now we have the broth for our soup, it needs some flavoring. What I like to use is homemade vegetable seasoning. Here is how I do it.
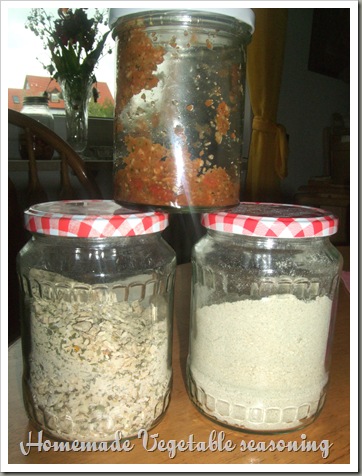
In the fall when root vegetables are dirt cheap I get tons of celeriac, leeks, parsley root (sort of like parsnips) and carrots. I usually have parsley and other herbs like lovage in my garden. Sometimes I add tomato powder or dried tomatoes. I wash and dry all those veggies than put them in my kitchen machine to make them real small. The smaller the pieces the better.
Now I mix salt under (this will help preserve it) in a ration of 4:1 (4 parts vegetables to 1 part salt/ 1000g vegetable to 250g salt). Fill it into glasses and store one jar in the fridge and the others in the freezer. This will last a long time if you don’t use it up even faster.
I make other mixes in powder form where I weigh out my veggies (so I know how much salt to add later), clean, dry and dehydrate them. After they are dehydrated I mix them with salt and pulse them in kitchen machine for a courser powder and in the Vitamix for a very fine powder. Those are the only seasonings I use in my stocks. No need to buy beef/chicken/vegetable cubes or there like. You can combine the vegetables in a way you like them.
Not to long ago I had a recipe from “The Kitch’n” on my feed for homemade bouillon. From there I took the tip to add cilantro and fennel to my fridge mix. Wow, I got to tell you, I was hesitant about the fennel in this but boy is this good. I make it with fennel and cilantro all the time now (only the fridge version). Why not give it a try yourself.
The broth is all done now. How about the cheese you ask? We are getting there.
A few days ago I saw this recipe at “Proud Italian Cook”. Perfect for Michelle’s cheese I thought.
And perfect it was. Very light dumplings and very tasty.
I used the last of the Pecorino cheese I had leftover from this recipe. I had exactly 3.5 oz left over and with the 1/2 lb of cheese I had made that was just what I needed.
Very good and a very satisfying lunch. Life is good!
I have another idea in my head on what to do with this cheese and I will get to you with that tomorrow.
Hint: How does Ravioli sound?
 Lemon Bag Cheese ala “Big Black Dog”
Michelle’s post was the motivator I needed. I present to you …..
Homemade cheese!
I made half a recipe (3c milk and 1c heavy cream) and it produced just a little over 1/2 lb of cheese.
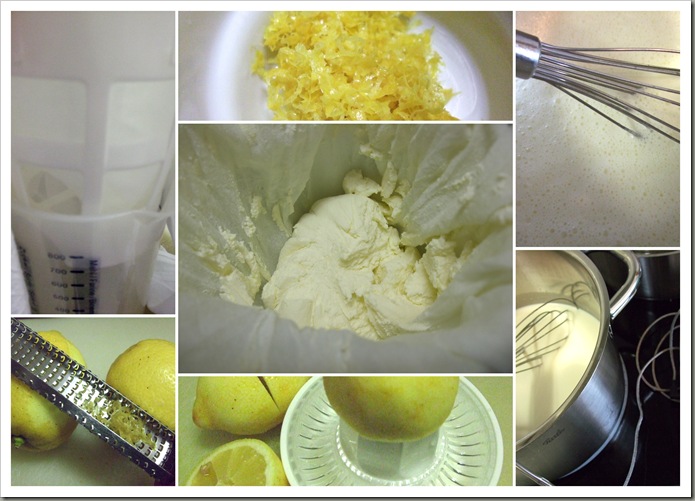 A couple things you want to keep in mind. Never, ever leave a lemon “un-zested”.
 How often do you wished you had some lemon zest? I always zest my lemons and what I don’t use right away I freeze in the small snack bags which I put into a freezer bag. All I have to do when I need zest and don’t have lemons is take out one of those snack bags with zest.
I always use “Bio” (organic) lemons. You want to make sure they are organic especially if you are planning on using the zest (and why would you not?).
The Zest in this picture ended up in today’s plum jam. That freezer is getting empty, yippee, I might pull this off. Two more bags of plums remain and they will be turned into cake for the movers.
Making this type of cheese is simple to make. All you do is heat up the milk to 100F than you add your lemon juice, stir and let it sit for a while. After that you strain it in a tea towel or something like that. After a while you have cheese and whey.
This whey I ended up tossing (It nearly broke my heart, all that nutritious whey down the drain). Only because I still have to much buttermilk in the house and less than 2 week before the movers come.
In the future if I make this cheese I will use the whey like I would buttermilk. I think that should work, don’t you?
to see what I turned this cheese into come back tomorrow
…Hint, Ricotta dumplings soup with homemade chicken broth anyone?
 Pecorino & Pepper Biscuits
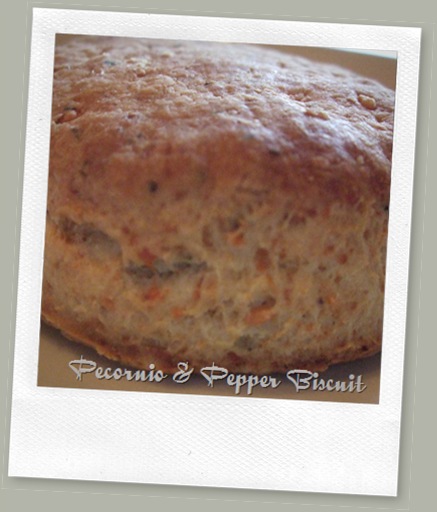
Pecorino Romano is a major player in this biscuit so I had to read up on it a little bit.
Apparently Pecorino Romano is one of four hard cheeses made in Italy from of ewe’s milk. This explains why it’s called Pecorino. The word pecora means sheep in Italian.
The Romano variety this recipe asks for is not appreciated in it’s place of origin. It’s considered to salty.
Ahm, I guess that is why they are exporting it to all of us.
No matter salty or not in these biscuits that cheese works just fine though I think I will add some more next time around.
Cracked pepper is another major player. I always have it in the house because it’s my pepper of choice. Just love cracked black pepper.
This is another The Modern Baker recipe and like all the other quick breads comes together just that, quickly.
I used my kitchen machine to shred up that cheese. That too was quick and easy.

This dough was much wetter than the cornbread. I needed some flour on my hands and on the board to get it together.
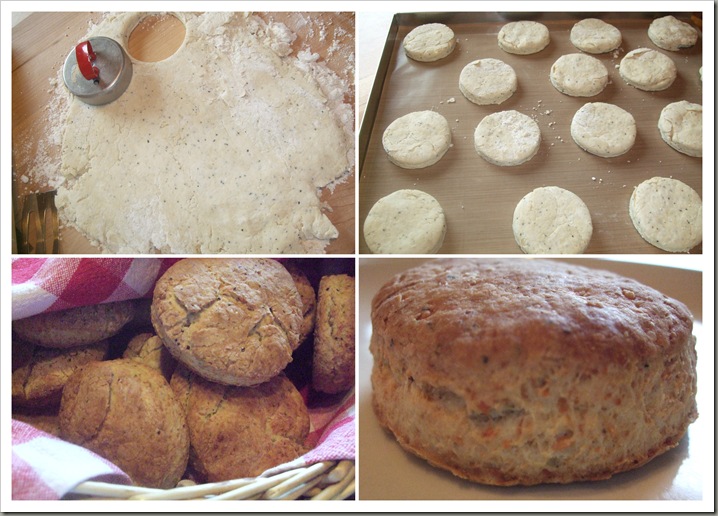 The trick here was to avoid the temptation to twist the cutter. You will need a straight down cut. No twisting or turning.
 Be careful not to over bake the biscuits. Mine where in there a few minutes to long. Still good but a tad dry. I will reduce my baking time to about 15 minutes next time and see from there.
Since I will bake through the entire book eventually with “The Modern Baker” group it’s a given that I will not post the recipe on my blog unless I see it on the net in which case I will link to that post.
See you next time.
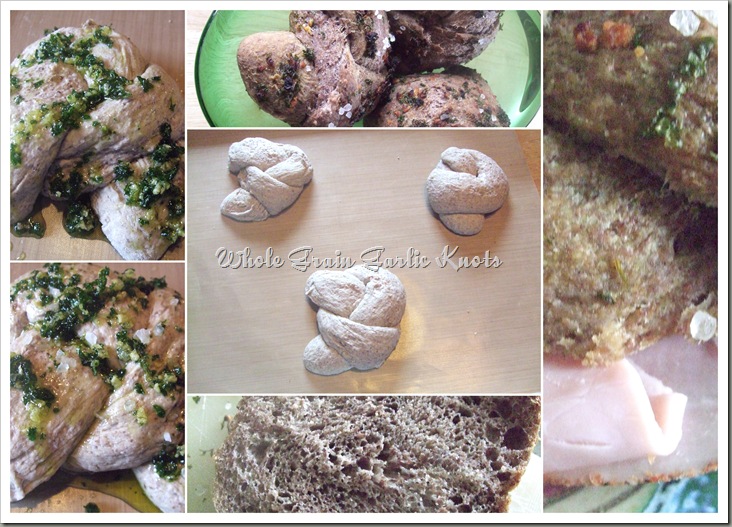
 Whole Grain Garlic knots – HBin5
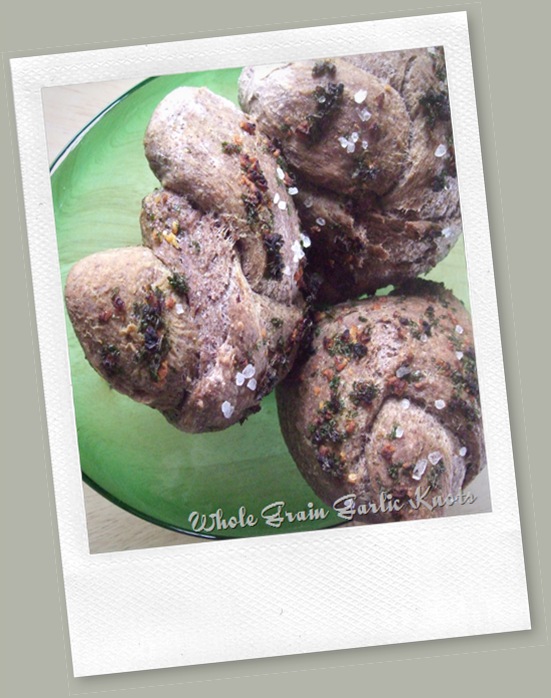
HBin5 Whole Grain Garlic knots
May 15th Bread Braid
1 full Master Recipe
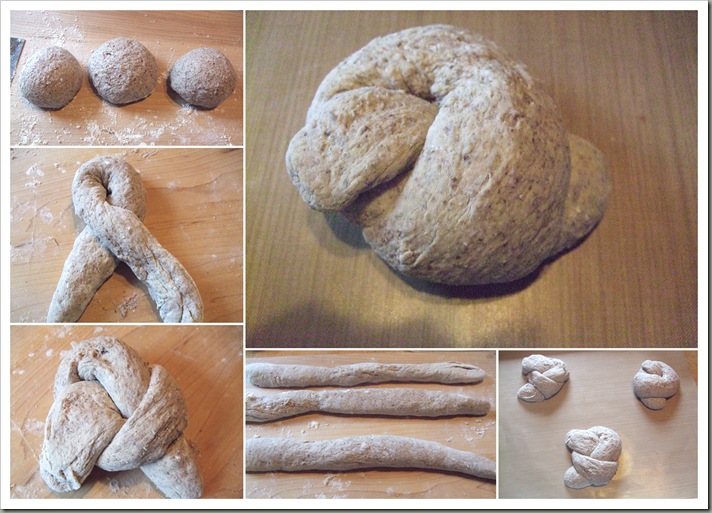 This part reminds me of my childhood more to the point the good old ‘play dough” times. In other words this is the time you get to play with the dough that will become your food.
 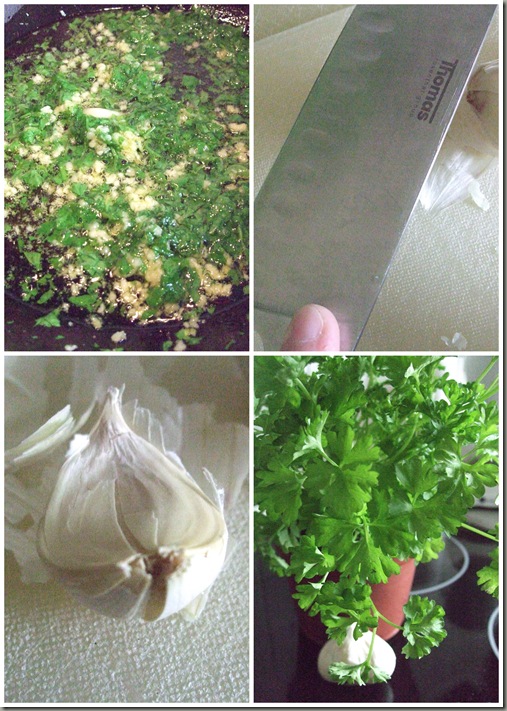 This is what gives the knot it’s name, garlic.
 A quick trick to easily peel garlic is to press down onto the knife with your fist/palm. The garlic will split and you can easily remove it’s skin.
Next time I make this bread I will go a bit of a different route.
This bread was great but I did not like the coloring or look after the baking. The Parsley did not stand up to the intense heat. Next time I would make an infusion of the oil and parsley than add the garlic.
This post will be linked to Michelle’s blog Big black dogs. Head on over there to see what the other bakers in this group did with this dough.
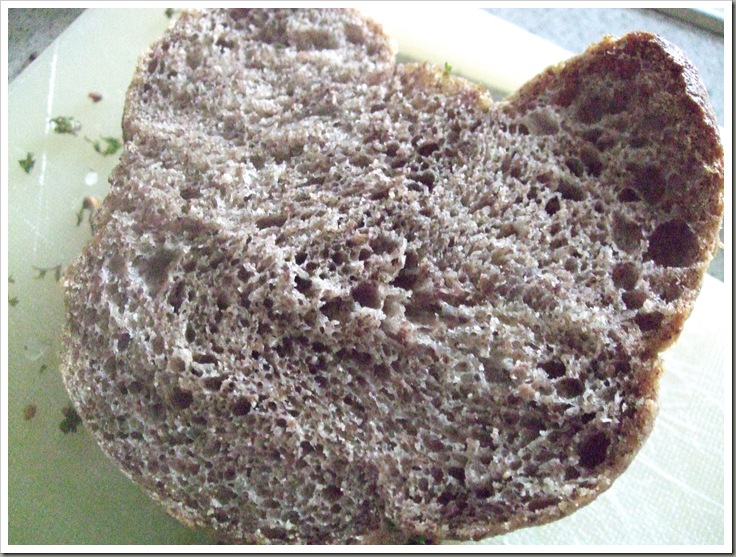
 Finally a master recipe bread again…9 HBin5 – Hearty Whole Wheat Sandwich Loaf
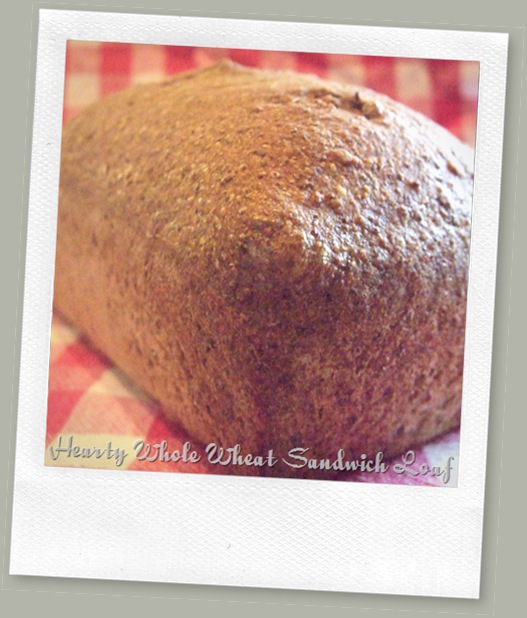
Time is of an essence as we close up shop here in Germany so this was just perfect.
You can find the recipe for the master recipe here in this Mother Earth News article.
All really great bread starts with fresh ingredients. What could be fresher than grinding your own flour. That is how I usually start any baked goods with whole wheat.
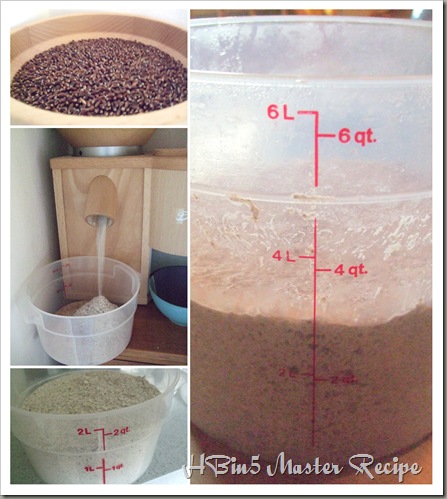
May 15th Bread Braid
1 full Master Recipe
Page 62-63 1 loaf of hearty Whole Wheat Sandwich Loaf
 Quick and easy! One little problem arose and that is the fact that I need a new lame (bread scoring tool). Mine was not sharp enough and tore my bread. Did not matter in the end because it’s tasty and that’s what counts!
This post will be linked to Michelle’s blog Big Black Dogs where you can read up on the results of my fellow bakers who attempt to bake through the Healthy Bread in 5 Minutes book.
 Ginger Scones with Almond Toppings
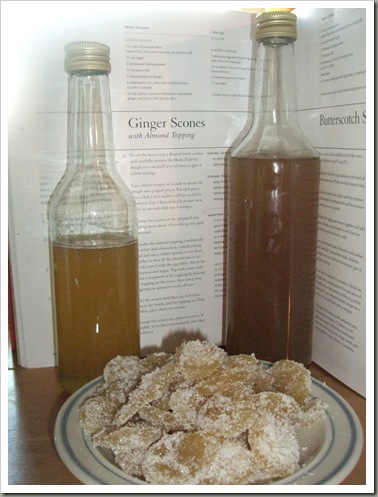
With the candied ginger taken care off I skipped to the kitchen to get bakin’ on another The Modern Baker quick bread recipe.
This recipe too did not fail my expectations. Not as gingery or sweet as one might think but very good.
I used 5 oz. of candied ginger and though they where quite spicy when eaten on their own they where not so in those scones. It’s a pleasure to bite into the scones and hit a piece of very soft ginger and have that aroma fill your mouth. Yum, is what sums it up.
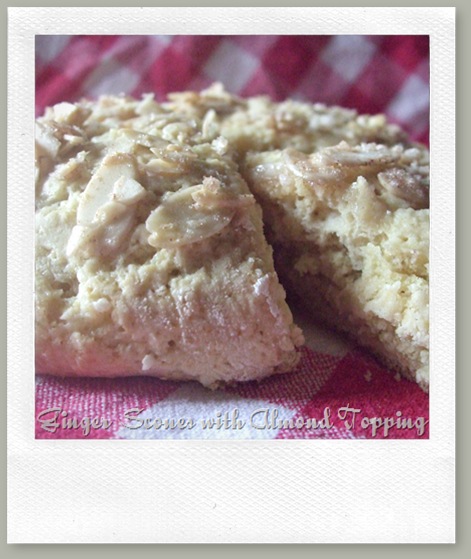
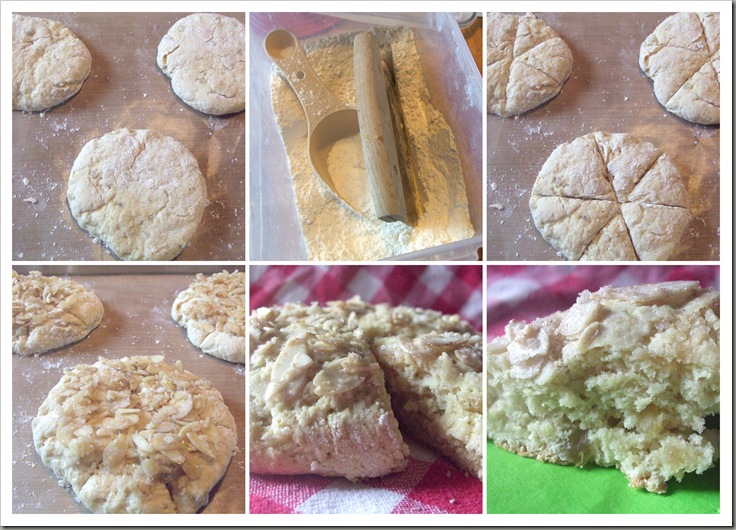
Like with all of Malgieri’s quick bread recipes these came together quickly. I really enjoy using my food processor for those types of recipes. All you do is mix your dry ingredients. Add your cold butter and pulse until it’s coarse (sandy like). Than you add your liquid and pulse until the dough combines and no more. That’s it, really simple and easy. All you have to do now is dump it all onto your baking surface (I have a big wooden board) and shape the scones. It takes no more than 15 minutes if at all. The danger is that you are done before your oven is preheated ;).
RECIPE:
I was able to find the recipe online here.
If you don’t have the book head on over to "Baking for neighbors" and make those scones today. Right after taking your first bite order your copy at Amazon or wherever you like to get your books from because you will be wanting more.
I can not see how you would be disappointed with this book.
See you in the Kitch’n soon!

 Candied Ginger
My quest to bake Ginger Scones from the Modern Baker had me looking for candied Ginger. Had my husband looking to be exact. That was a week ago. He came up empty handed because neither the commissary nor the local grocery store he went to carried it.
Today I thought about what I would bake this week and those scones made the list. Having made candied orange peel years back I knew it could not be all that hard to make candied ginger myself.
I Googled it and came up with David Lebovitz's take on making candied ginger. It’s basically a simple syrup.
Off I went to the store to get some ginger. Though candied ginger might be a problem to get in some stores fresh ginger is hardly ever not available. I love how my local “Edeka” Grocery store displays their veggies especially things like ginger. Not just are they in pretty wicker baskets but they are stored out of moistures way.
I have seen ginger under the mister to many times in the USA and often found them moldy right there in the store.
Not here in Germany. No mister = no mold! I never keep ginger in the fridge either. I keep it in a hanging wire basket in my dark pantry it will keep for weeks.
Come to find out that Edeka does carry candied ginger but I was on a mission to make my own and the price only helped to bring that mission home.
1000grams (1kilo) cost Euro 4,90 fresh where 100grams of candied ginger cost a whopping Euro 2,29. That means I can make 5 times my own for the cost of 1 box of that candied ginger. That is hefty I would say.
 Turns out making candied ginger is not just very easy to make it is so much better than any candied ginger I have ever eaten purchased from a store. It’s spicy and sweet and oh so good. I will make my own from now on, that’s for sure.
I bought a piece of root just a little over 300grams. I reduced the recipe to that amount and went to work.
David suggests to use the back of a spoon to peel the ginger. I find that using my veggie peeler (the one that peels very thinly) works just fine. It took me less than 5 minutes to peel and cut up that ginger.
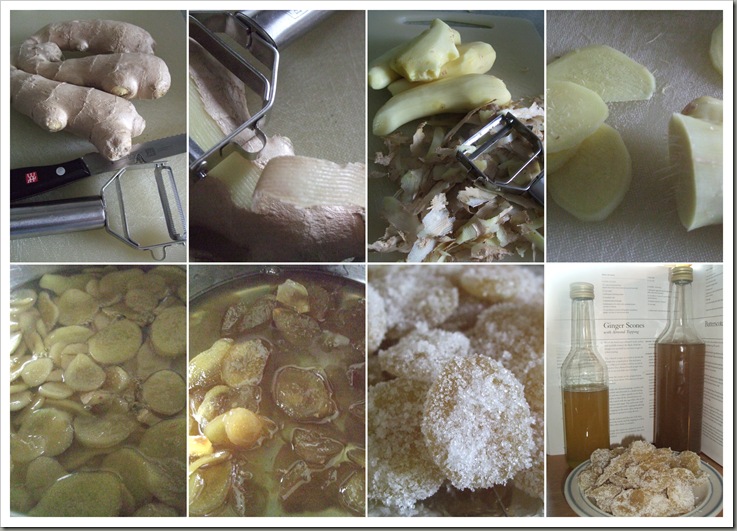 I followed the steps of simmering the ginger twice in just plain water but instead of throwing the water away I kept it. It’s allergy season and ginger is great for scratchy throats. I have been drinking ginger tea during winter for years whenever my throat hurts. It’s just as great in the spring. Simply sweeten it to your liking or add some of the leftover ginger syrup.
Next time I will reduce the cooking to one time but I will cook it for about 30 minutes. The cooking helps to soften the fiber. David explains that sugar has the tendency to harden the fiber and since ginger is pretty fibrous we don’t want that to happen.
The final procedure included cooking the drained ginger in a sugar solution. To reduce that solution to a thin honey like consistency it took about an hour. By that time the ginger was just right. I left it in the syrup for a while longer after turning of the stove. Drained it and a little while later sugared them. OMG, this is sooo good, I can’t stop eating it.
If you have never made candied ginger before I suggest you put ginger on your next shopping list and give it a try especially if you are planning on making the Ginger Scones from “The Modern Baker” book. You will hear about those tomorrow.
PS: don’t throw the syrup solution away. This can be used in all sorts of ways. For instance as a sort of ginger ale (use 1/3 of syrup for every 3 parts of fizzy water).
 A little trip to India…
So this recipe came at a perfect time.
I have never had it before so I watched the video to see what the finished product should look like. First problem was that I do not own a Sev-Maker. Where there is a will there is a way I thought and voila I simply used my potato ricer.
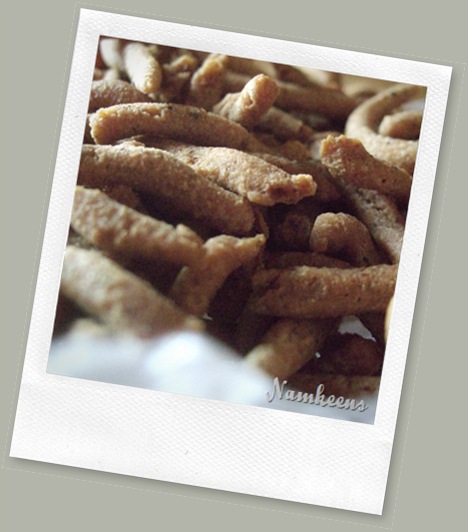
The “namkeens” (savory snack) did not turn out in nice long strands and nest like they did for Anuja and Hetal at “show me the Curry” but they did turn out and tasted mighty fine.
I am quite happy with the outcome and now have another way to use up my Gram flour.
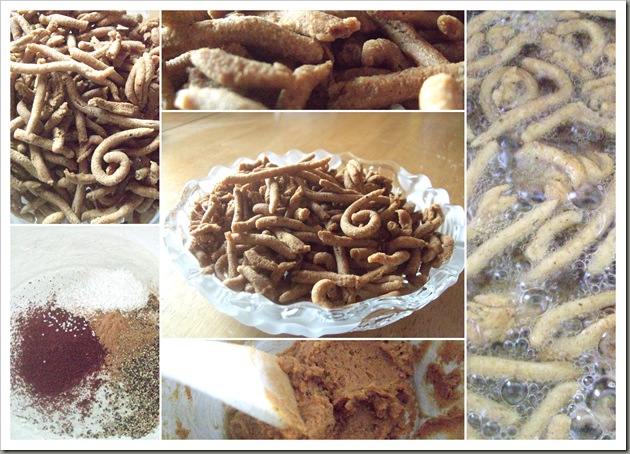
Recipe (for details and to watch the video head on over to “show me the curry”)
Ingredients:
Cinnamon Powder – 1/4 tsp
Cloves Powder – 1/4 tsp
Coarse Black Pepper Powder – 1/2 tsp
Red Chili Powder – 1/2 tsp or to taste
Salt – 1/2 tsp
Water – 1/4 cup
Oil – 1 tbsp
Baking Soda – a pinch
Lemon /Lime Juice – 1 tsp
Chickpea Flour (Besan) – 1 cup
Oil for deep frying
Method:
1. In a bowl mix everything except the Chickpea Flour.
2. Mix well and then add the Chickpea Flour little at a time, mixing constantly, making sure lumps don’t form.
3. Heat the Oil for frying.
4. Grease the inside of the Sev-Maker.
5. Wipe the outside of the Sev-Maker and wash hands and make sure they are not slippery.
6. Pour some of the mixture into the Sev-Maker and close it.
7. Once the oil is hot, rotate the sev-maker and in a circular motion pour carefully into the oil.
8. Once you have completed one circle, rotate the sev-maker backwards to stop the flow.
9. Cook the sev on medium heat for about 3-4 minutes and flip using the help of another spoon or fork (to avoid splashing)
10. Cook on the other side for a couple of minutes till there are no more bubbles forming.
11. Take out the sev and place on a paper towel.
12. Allow it to cool down to room temperature.
13. Break into pieces and store in an air-tight container and store.
14. Does not need to be refrigerated.
 Milk and Honey Raisin Bread…8 Hbin5
HBin 5, Milk and Honey Raisin Bread
1/2 recipe
page 270
changes: I used coconut milk instead of the water
The second loaf for this month HBin5 bread braid is the Milk and Honey Raisin Bread.
The dough was very stiff when I whipped it up considering this bread only has 4 cups of fluids to over 9 cups of flour I am not surprised.
I was tempted to add quite a bit of milk to this one but did not just to see how this would turn out. I let it sit for 2 hours and put it in the fridge for about 4 hours than got ready make a loaf.
After shaping the loaf I still had a little dough left over so I made some cinnamon rolls (Schneckennudel) from the rest.
Simply whipped up some cinnamon, sugar and butter, spread it on the dough, rolled it up and cut them.

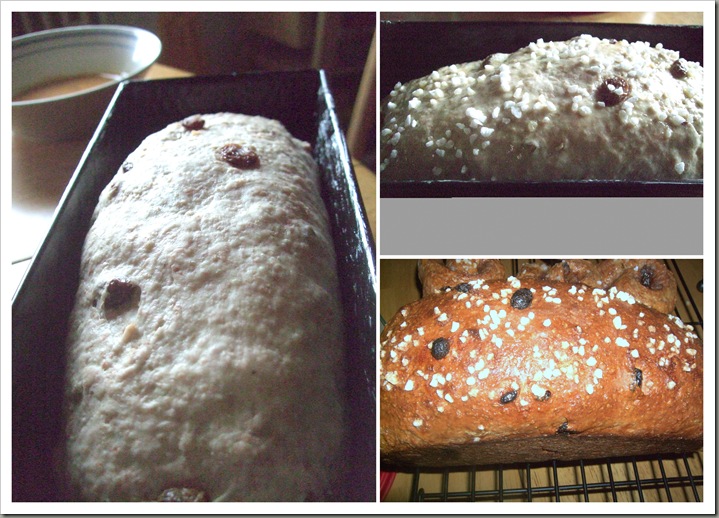
The cinnamon rolls turned out great however I will add more milk to it next time to give it more moisture and a lighter interior.
The loaf was not cut yet so can’t say how the crumb turned out. Will do a shot when I cut into it.
To see what the rest of HBin5 Group made with these dough’s head on over to Michelle's blog “Big Black dogs”
Recipe – found on the net here
4 3/4 cups whole wheat flour
4 1/2 cups unbleached AP flour
1 1/2 tbsp granulated yeast (or two packets)
1 tbsp kosher salt (I increase the salt by a bit in all the recipes in this book, as they purposely decreased it for the sodium-conscious)
1/4 cup vital wheat gluten
2 cups milk
2 cups lukewarm water
1/3 cup honey or agave
3/4 cup raisins (I used more - at least a cup)
egg wash for brushing top
raw sugar for sprinkling on top
1. Whisk together flours, yeast salt and vital wheat gluten
2. Combine remaining ingredients and mix them with a spoon or food processor
3. Cover (not airtight_and allow to rise at room temp for 2 hours until dough rises and collapses)
4. Easier to work with cold dough - refrigerate and use up to 10 days
5. On baking day, grease 8.5 x 4.5 inch nonstick loaf pan. Flour the top and cut off 2-lb piece of dough. Shape into a ball as you normally would.
6. Shape into oval and place in pan. Allow to rest covered in plastic wrap for 90 minutes.
7. Thirty minutes before baking, preheat oven to 375 with rack in center of oven. No stone required.
8. Just before baking, brush top with egg wash and sprinkle with sugar (don't go too crazy or the top gets too dark).
9. Bake 45 minutes until brown and firm.
10. Immediately remove from pan and allow to cool before slicing.
 Pumpkin Pie Brioche Cinnamon Crescent Rolls….8 HBin5
I feel like Mother’s day arrived already. My oldest is coming home this weekend and we have not seen him since September.
That means he was not home for Thanksgiving or Christmas. Poor me, poor me and him too of course.
See we have a little Ocean separating us for a few more month therefore It was not possible for him to come in the 4 days or so he got off during the holidays.
Now A-school is over and he has about ten days off which means he will be home on Mothers day. Now all we have to do is keep our fingers crossed that this little volcano in Iceland keeps it’s peace.
Of course my son loves backed goods, which 19 year old does not so I am baking up a storm. Gotta keep that oven primed and ready.
I found a large can of pumpkin puree in the cupboard and I took Michelle’s (Big Black Dogs) offer to do the pumpkin pie brioche for May 1st HBin5 bread braid since we had made the chocolate espresso brioche for Valentines day.

OMG, I have missed out big time and so have you! The guys in the house (my dear husband and younger son) where over the moon especially my husband.
That cream cheese Frosting is the dot on the i, just perfect. 

So if you want to surprise Mom on Mother’s day and if you are not a great baker but can follow instructions why not make this pumpkin cinnamon bread for her breakfast. start it Friday before Mother’s day. Get the dough out Saturday late afternoon and bake it up in the evening. Wishing you great success!
To see what the rest of HBin5 Group made with these dough’s head on over to Michelle's blog “Big Black dogs”
Recipe
Pumpkin Pie brioche Cinnamon Crescent Rolls with Cream Cheese Icing
page 294 HBin5
Makes enough dough for at least two 2-pound loaves.
3 cups white whole wheat flour
4 1/2 cups unbleached all-purpose flour
1 1/2 tablespoons granulated yeast, or 2 packets
1 tablespoon kosher salt (increase or decrease to taste)
2 tablespoons vital wheat gluten
1 teaspoon ground cinnamon
1/2 teaspoon ground ginger
1/2 teaspoon ground nutmeg
1/4 teaspoon ground allspice
1 1/4 cups lukewarm water
4 large eggs
1/2 cup honey
3/4 cup neutral-flavored oil, or unsalted butter, melted, or zero trans fat, zero hydrogenated oil margarine, melted
1 15 ounce can pumpkin puree
The authors have the recipe on their webpage so just follow this link for the instructions.
Honey Cream cheese Icing:
this Icing comes very close to the HBin5 version. Use 4 oz of cream cheese though. More honey is always good.
 Real Welsh Scones one never stops learning
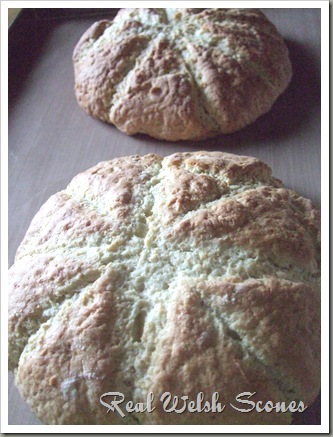 I have never eaten or baked a scone before so this is reason for a celebration. I achieved to do both in one day.
 I tried to find out a little about scones since they are so new to me. I found out that scones where mentioned in a publication for the first time in 1513 by a Scottish poet.
There are different views out on where the word scone itself came from. I like this version the best because I think it makes a valid point. (The Oxford dictionary believes that it comes from a word "sgonn" meaning mouthful or shapeless mass). They are a mouthful and they are rather shapeless aren’t they?
Scones are done in the Welsh tradition of cooking yeast breads on bake stones. Had I researched this prior to baking I think I might have done them on the stovetop. Just to keep the mystic going.
My research has me think that traditional scones might have been made with no leavener at all. “The American style of scone is made with the baking powder and are a quick bread. The English version usually involves a lemon curd”. That would make sense since baking powder was not discovered until 1843 yet it was mentioned over 300 years prior for the first time publicly and had been around even longer.
No matter who baked them for the first time and who made them popular in our times they are indeed something that you can put on the table when you get a last minute visitor for tea or coffee. Quick and easy, a quick bread, what can I say.
This is another recipe from Nick Malgieri and I am jumping up and down from joy because he commented on my last “The Modern Baker” post, yup he did, he did…
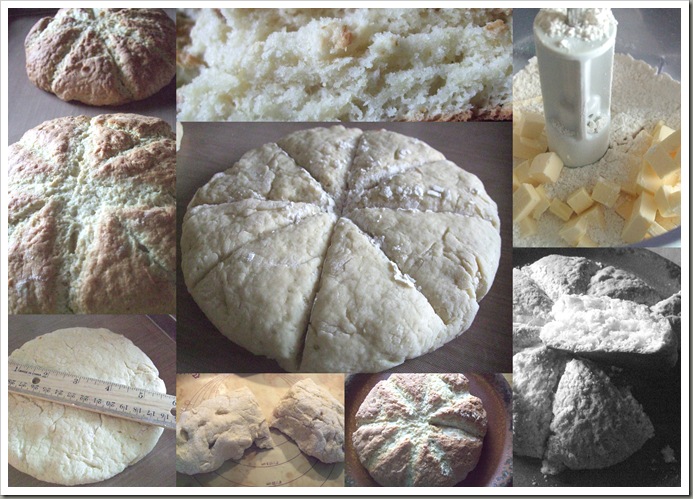
Real Welsh Scones (recipe found on the web @ “Intrigue of…”)
2 1/4 c. all-purpose flour
1/3 c. sugar
1 T baking powder
1 tsp. cream of tartar( I did not have any so I used 1 tsp. lemon juice)
1/2 tsp. salt
8 T cold unsalted butter, diced into cubes
1 large egg
1/2 c. milk
Preheat oven to 450
Whisk milk and egg in a bowl and set aside
In a food processor, combine, flour, sugar, salt and cream of tartar.
Add the butter a few knobs at a time and pulse. Once all of the butter is incorporated it should have mealy dry consistency.
Pour the flour mix. into a large bowl and gradually pour in the milk and egg mix. Stir with a fork ( I don’t know why a fork specifically) until you have a doughy mass. Everything should incorporate completely and will have a semi-sticky consistency.
On a lightly floured surface knead the dough over about 3-4 times until it is relatively smooth.
Cut the dough in half, and form each half into disc shapes about 6 inches in diameter.
With a scraper knife, regular knife, or whatever you want to use, gently indent the surface of the disc so that you make wedges, but don’t cut all the way through. (I’m sure this technique has a name but I don’t know what it is or what it’s purpose is. But if it’s traditional then I’m doing it)
Slide each disc onto a parchment lined baking sheet and bake 10-15 min. until it is a dark golden color.

 Rustic Bread ala Hamelman –Mellow Bakers-
I have been waiting for "Bread"a bread baking book by Hamelman to arrive when the Iceland volcano started to cause trouble. The ashes caused European airspace to be pretty much empty for almost a week which meant that my book was who-knows-where waiting for the long haul here.
Last Thursday our local APO finally received a big shipment and with it my book. Yippee, can you tell I am excited?
Friday I pulled out the book, checked the Mellow Bakers online page to see which bread to start with first.
Mellow Bakers: What is it?
Mellow Bakers is a group of bread baking enthusiasts who look to bake a particular bread or breads together each month. Specific breads will be announced on the site every month and members can choose to make these breads as a group then post and share their results.
(for more information on Mellow Bakers, to read, to join etc. check here)
The group decided on a pace of 3 breads a month. Great because that way I will try new recipes and at the same time still have time to make old time favorites or other recipes without getting sick and tired of bread (yeah, like that is going to happen, NOT). Here is the first recipe I chose from the options provided.

Rustic Bread
“Bread” by Jeffrey Hamelman
Page 115
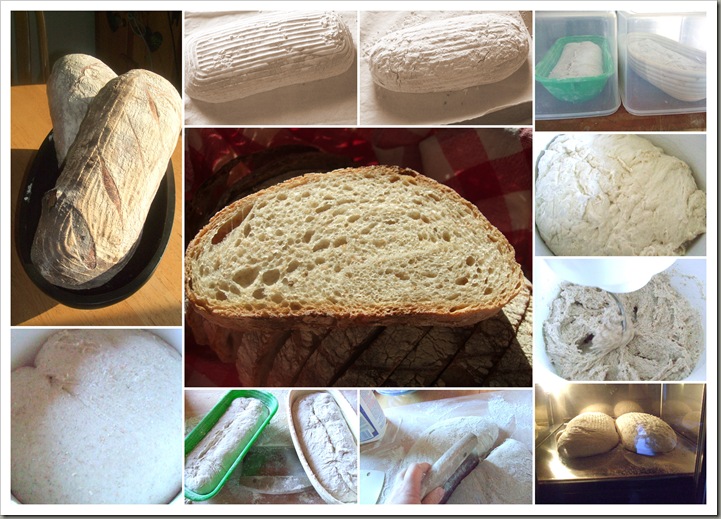
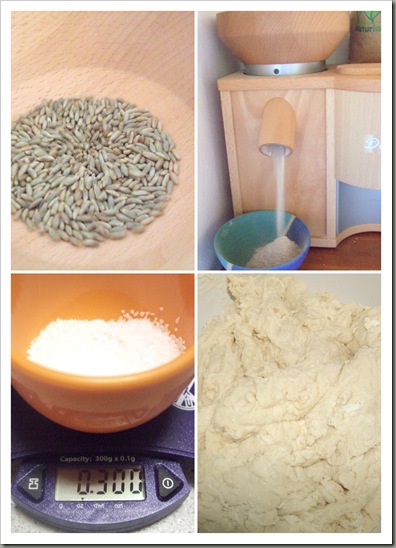 This recipe starts out with a pre-ferment that will ferment for 12-16 hours. This will help create some great flavor and also will aid in a longer shelf life.
 Recipe linked from "The Fresh Loaf"
Rustic Bread
Makes 2 large loaves
Preferment:
1 lb. bread flour (3 1/2 cups)
9.5 oz. water (1 1/4 cups)
1/2 tablespoon salt
1/8 teaspoon instant yeast
Final dough:
10 oz. bread flour (2 1/2 cups)
6 oz. whole wheat or rye flour or a mixture of them (around 1 1/2 cups)
12.5 oz. water (1 1/2 cups)
1/2 tablespoon salt
1/2 teaspoon instant yeast
all of the preferment
For the instructions on how to bake this bread please head on over to the “Fresh Loaf” link above.
This Bread has been Yeast spotted
Category
- Bread (1)
- Bread Pudding (1)
- Bundt Cake (1)
- Cake (1)
- Canning (2)
- Cheese (5)
- crackers (2)
- Easter (1)
- Flatbreads / Pizza (1)
- HBin5-No Knead (18)
- Make your own (4)
- Mellow Bakers (1)
- Pasta (2)
- Pie (3)
- Quick Breads (5)
- Rolls and such (1)
- Rye (1)
- Sandwich Bread (1)
- Schwarzbrot (1)
- Sheet cake (3)
- Sheet cake w/yeast (2)
- snacks (1)
- Sourdough (2)
- Sweet breads (1)
- The Modern Baker (11)
- Yogurt (2)


