 A little trip to India…
So this recipe came at a perfect time.
I have never had it before so I watched the video to see what the finished product should look like. First problem was that I do not own a Sev-Maker. Where there is a will there is a way I thought and voila I simply used my potato ricer.
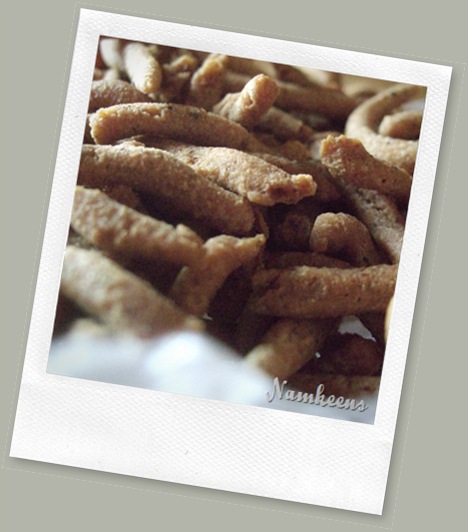
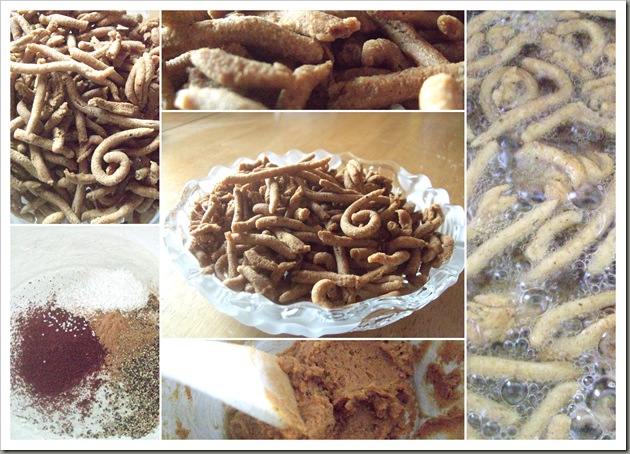
The “namkeens” (savory snack) did not turn out in nice long strands and nest like they did for Anuja and Hetal at “show me the Curry” but they did turn out and tasted mighty fine.
I am quite happy with the outcome and now have another way to use up my Gram flour.
Recipe (for details and to watch the video head on over to “show me the curry”)
Ingredients:
Cinnamon Powder – 1/4 tsp
Cloves Powder – 1/4 tsp
Coarse Black Pepper Powder – 1/2 tsp
Red Chili Powder – 1/2 tsp or to taste
Salt – 1/2 tsp
Water – 1/4 cup
Oil – 1 tbsp
Baking Soda – a pinch
Lemon /Lime Juice – 1 tsp
Chickpea Flour (Besan) – 1 cup
Oil for deep frying
Method:
1. In a bowl mix everything except the Chickpea Flour.
2. Mix well and then add the Chickpea Flour little at a time, mixing constantly, making sure lumps don’t form.
3. Heat the Oil for frying.
4. Grease the inside of the Sev-Maker.
5. Wipe the outside of the Sev-Maker and wash hands and make sure they are not slippery.
6. Pour some of the mixture into the Sev-Maker and close it.
7. Once the oil is hot, rotate the sev-maker and in a circular motion pour carefully into the oil.
8. Once you have completed one circle, rotate the sev-maker backwards to stop the flow.
9. Cook the sev on medium heat for about 3-4 minutes and flip using the help of another spoon or fork (to avoid splashing)
10. Cook on the other side for a couple of minutes till there are no more bubbles forming.
11. Take out the sev and place on a paper towel.
12. Allow it to cool down to room temperature.
13. Break into pieces and store in an air-tight container and store.
14. Does not need to be refrigerated.
 Milk and Honey Raisin Bread…8 Hbin5
HBin 5, Milk and Honey Raisin Bread
1/2 recipe
page 270
changes: I used coconut milk instead of the water
The second loaf for this month HBin5 bread braid is the Milk and Honey Raisin Bread.
The dough was very stiff when I whipped it up considering this bread only has 4 cups of fluids to over 9 cups of flour I am not surprised.
I was tempted to add quite a bit of milk to this one but did not just to see how this would turn out. I let it sit for 2 hours and put it in the fridge for about 4 hours than got ready make a loaf.
After shaping the loaf I still had a little dough left over so I made some cinnamon rolls (Schneckennudel) from the rest.
Simply whipped up some cinnamon, sugar and butter, spread it on the dough, rolled it up and cut them.

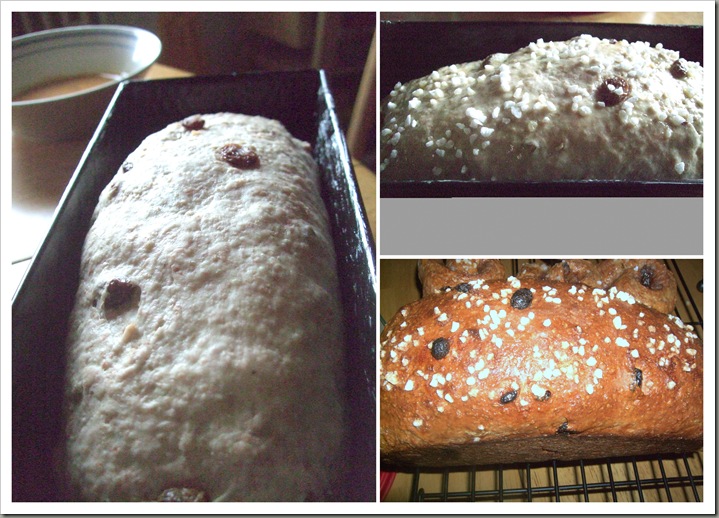
The cinnamon rolls turned out great however I will add more milk to it next time to give it more moisture and a lighter interior.
The loaf was not cut yet so can’t say how the crumb turned out. Will do a shot when I cut into it.
To see what the rest of HBin5 Group made with these dough’s head on over to Michelle's blog “Big Black dogs”
Recipe – found on the net here
4 3/4 cups whole wheat flour
4 1/2 cups unbleached AP flour
1 1/2 tbsp granulated yeast (or two packets)
1 tbsp kosher salt (I increase the salt by a bit in all the recipes in this book, as they purposely decreased it for the sodium-conscious)
1/4 cup vital wheat gluten
2 cups milk
2 cups lukewarm water
1/3 cup honey or agave
3/4 cup raisins (I used more - at least a cup)
egg wash for brushing top
raw sugar for sprinkling on top
1. Whisk together flours, yeast salt and vital wheat gluten
2. Combine remaining ingredients and mix them with a spoon or food processor
3. Cover (not airtight_and allow to rise at room temp for 2 hours until dough rises and collapses)
4. Easier to work with cold dough - refrigerate and use up to 10 days
5. On baking day, grease 8.5 x 4.5 inch nonstick loaf pan. Flour the top and cut off 2-lb piece of dough. Shape into a ball as you normally would.
6. Shape into oval and place in pan. Allow to rest covered in plastic wrap for 90 minutes.
7. Thirty minutes before baking, preheat oven to 375 with rack in center of oven. No stone required.
8. Just before baking, brush top with egg wash and sprinkle with sugar (don't go too crazy or the top gets too dark).
9. Bake 45 minutes until brown and firm.
10. Immediately remove from pan and allow to cool before slicing.
 Pumpkin Pie Brioche Cinnamon Crescent Rolls….8 HBin5
I feel like Mother’s day arrived already. My oldest is coming home this weekend and we have not seen him since September.
That means he was not home for Thanksgiving or Christmas. Poor me, poor me and him too of course.
See we have a little Ocean separating us for a few more month therefore It was not possible for him to come in the 4 days or so he got off during the holidays.
Now A-school is over and he has about ten days off which means he will be home on Mothers day. Now all we have to do is keep our fingers crossed that this little volcano in Iceland keeps it’s peace.
Of course my son loves backed goods, which 19 year old does not so I am baking up a storm. Gotta keep that oven primed and ready.
I found a large can of pumpkin puree in the cupboard and I took Michelle’s (Big Black Dogs) offer to do the pumpkin pie brioche for May 1st HBin5 bread braid since we had made the chocolate espresso brioche for Valentines day.

OMG, I have missed out big time and so have you! The guys in the house (my dear husband and younger son) where over the moon especially my husband.
That cream cheese Frosting is the dot on the i, just perfect. 

So if you want to surprise Mom on Mother’s day and if you are not a great baker but can follow instructions why not make this pumpkin cinnamon bread for her breakfast. start it Friday before Mother’s day. Get the dough out Saturday late afternoon and bake it up in the evening. Wishing you great success!
To see what the rest of HBin5 Group made with these dough’s head on over to Michelle's blog “Big Black dogs”
Recipe
Pumpkin Pie brioche Cinnamon Crescent Rolls with Cream Cheese Icing
page 294 HBin5
Makes enough dough for at least two 2-pound loaves.
3 cups white whole wheat flour
4 1/2 cups unbleached all-purpose flour
1 1/2 tablespoons granulated yeast, or 2 packets
1 tablespoon kosher salt (increase or decrease to taste)
2 tablespoons vital wheat gluten
1 teaspoon ground cinnamon
1/2 teaspoon ground ginger
1/2 teaspoon ground nutmeg
1/4 teaspoon ground allspice
1 1/4 cups lukewarm water
4 large eggs
1/2 cup honey
3/4 cup neutral-flavored oil, or unsalted butter, melted, or zero trans fat, zero hydrogenated oil margarine, melted
1 15 ounce can pumpkin puree
The authors have the recipe on their webpage so just follow this link for the instructions.
Honey Cream cheese Icing:
this Icing comes very close to the HBin5 version. Use 4 oz of cream cheese though. More honey is always good.
 Real Welsh Scones one never stops learning
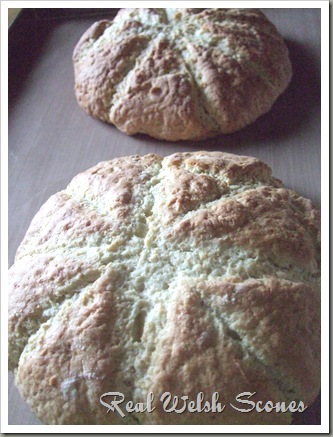 I have never eaten or baked a scone before so this is reason for a celebration. I achieved to do both in one day.
 I tried to find out a little about scones since they are so new to me. I found out that scones where mentioned in a publication for the first time in 1513 by a Scottish poet.
There are different views out on where the word scone itself came from. I like this version the best because I think it makes a valid point. (The Oxford dictionary believes that it comes from a word "sgonn" meaning mouthful or shapeless mass). They are a mouthful and they are rather shapeless aren’t they?
Scones are done in the Welsh tradition of cooking yeast breads on bake stones. Had I researched this prior to baking I think I might have done them on the stovetop. Just to keep the mystic going.
My research has me think that traditional scones might have been made with no leavener at all. “The American style of scone is made with the baking powder and are a quick bread. The English version usually involves a lemon curd”. That would make sense since baking powder was not discovered until 1843 yet it was mentioned over 300 years prior for the first time publicly and had been around even longer.
No matter who baked them for the first time and who made them popular in our times they are indeed something that you can put on the table when you get a last minute visitor for tea or coffee. Quick and easy, a quick bread, what can I say.
This is another recipe from Nick Malgieri and I am jumping up and down from joy because he commented on my last “The Modern Baker” post, yup he did, he did…
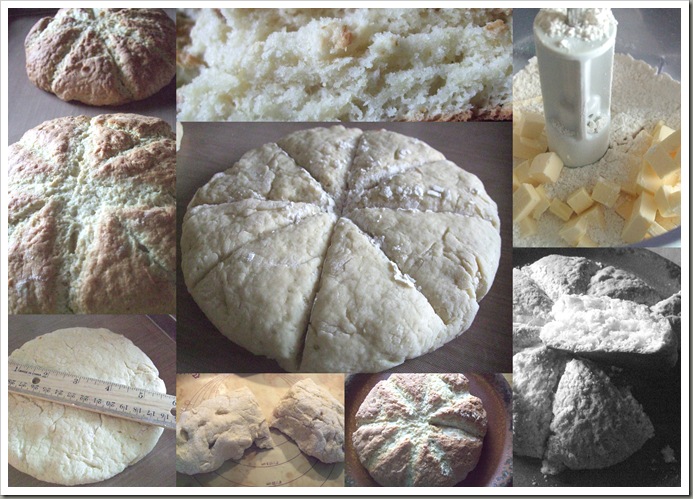
Real Welsh Scones (recipe found on the web @ “Intrigue of…”)
2 1/4 c. all-purpose flour
1/3 c. sugar
1 T baking powder
1 tsp. cream of tartar( I did not have any so I used 1 tsp. lemon juice)
1/2 tsp. salt
8 T cold unsalted butter, diced into cubes
1 large egg
1/2 c. milk
Preheat oven to 450
Whisk milk and egg in a bowl and set aside
In a food processor, combine, flour, sugar, salt and cream of tartar.
Add the butter a few knobs at a time and pulse. Once all of the butter is incorporated it should have mealy dry consistency.
Pour the flour mix. into a large bowl and gradually pour in the milk and egg mix. Stir with a fork ( I don’t know why a fork specifically) until you have a doughy mass. Everything should incorporate completely and will have a semi-sticky consistency.
On a lightly floured surface knead the dough over about 3-4 times until it is relatively smooth.
Cut the dough in half, and form each half into disc shapes about 6 inches in diameter.
With a scraper knife, regular knife, or whatever you want to use, gently indent the surface of the disc so that you make wedges, but don’t cut all the way through. (I’m sure this technique has a name but I don’t know what it is or what it’s purpose is. But if it’s traditional then I’m doing it)
Slide each disc onto a parchment lined baking sheet and bake 10-15 min. until it is a dark golden color.

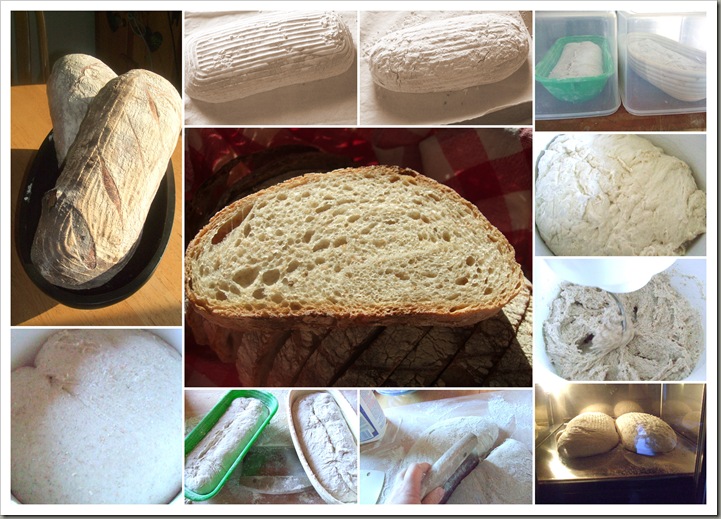
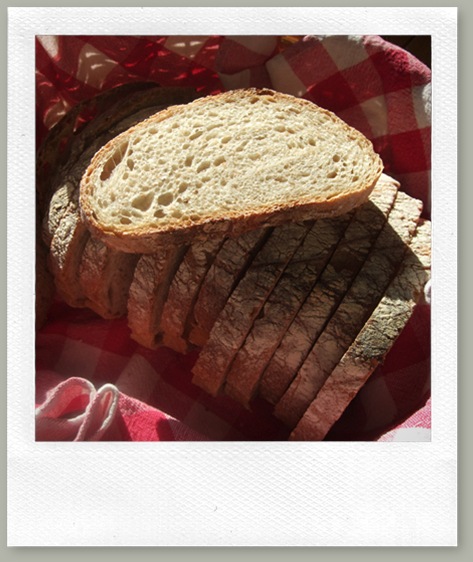
 Rustic Bread ala Hamelman –Mellow Bakers-
I have been waiting for "Bread"a bread baking book by Hamelman to arrive when the Iceland volcano started to cause trouble. The ashes caused European airspace to be pretty much empty for almost a week which meant that my book was who-knows-where waiting for the long haul here.
Last Thursday our local APO finally received a big shipment and with it my book. Yippee, can you tell I am excited?
Friday I pulled out the book, checked the Mellow Bakers online page to see which bread to start with first.
Mellow Bakers: What is it?
Mellow Bakers is a group of bread baking enthusiasts who look to bake a particular bread or breads together each month. Specific breads will be announced on the site every month and members can choose to make these breads as a group then post and share their results.
(for more information on Mellow Bakers, to read, to join etc. check here)
The group decided on a pace of 3 breads a month. Great because that way I will try new recipes and at the same time still have time to make old time favorites or other recipes without getting sick and tired of bread (yeah, like that is going to happen, NOT). Here is the first recipe I chose from the options provided.

Rustic Bread
“Bread” by Jeffrey Hamelman
Page 115
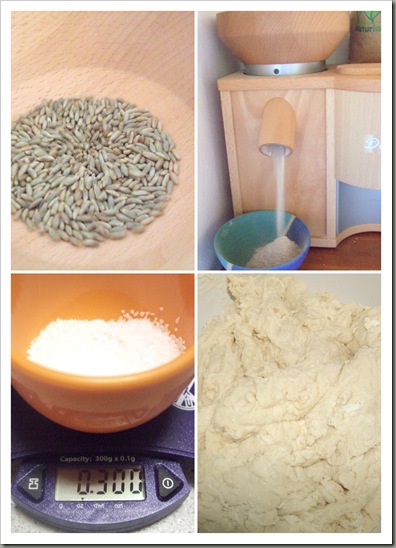 This recipe starts out with a pre-ferment that will ferment for 12-16 hours. This will help create some great flavor and also will aid in a longer shelf life.
 Recipe linked from "The Fresh Loaf"
Rustic Bread
Makes 2 large loaves
Preferment:
1 lb. bread flour (3 1/2 cups)
9.5 oz. water (1 1/4 cups)
1/2 tablespoon salt
1/8 teaspoon instant yeast
Final dough:
10 oz. bread flour (2 1/2 cups)
6 oz. whole wheat or rye flour or a mixture of them (around 1 1/2 cups)
12.5 oz. water (1 1/2 cups)
1/2 tablespoon salt
1/2 teaspoon instant yeast
all of the preferment
For the instructions on how to bake this bread please head on over to the “Fresh Loaf” link above.
This Bread has been Yeast spotted
 Strawberry Shortcakes a perfect ending to a delicious meal
 All winter long I have been watching to buy seasonal and regional and with the arrival of Spring we are so ready for some fresh fruits and vegetables.
 I checked to see where these strawberries came from since our strawberries here are nowhere ready to be harvested. Asparagus is in full harvest mode but not strawberries.
The label told me they came from Spain (not regional for sure). I hesitated since that would mean a long haul to get here. Than I started to think about our upcoming move to El Paso.
There most things will have to be trucked in from surrounding more hospitable areas.
I went to check on Google Map to see how far it would be from my place in Bavaria near the Czech border to Barcelona, Spain and found out it’s 1493 km (about 933 miles) from our house. According to Google maps that comes out to 13.22 hours of driving time.
Next I checked how far it would be across Texas from El Paso to Texarkana and that turned out to be 811 miles or 13.32 hours driving time.
As you can see from the picture above I caved in and bought the Strawberries and turned them into this seasons first Strawberry shortcakes.
This is a dessert that’s so quick, easy and well loved in our home.
Here is the Recipe I use. It originates from the Joy of cooking which I adapted.
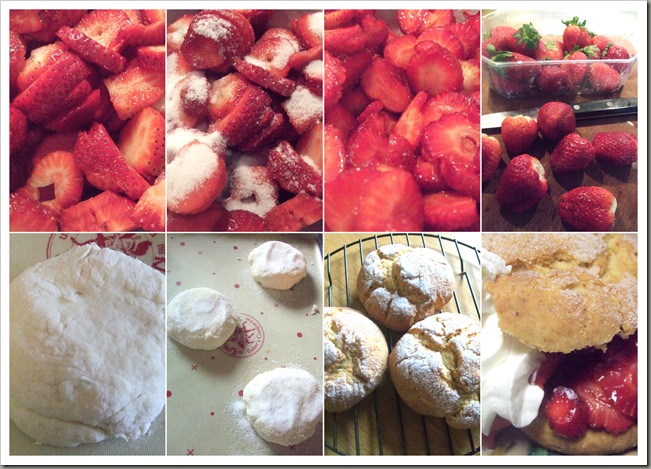
Shortcake Recipe
makes 6 shortcakes
2c Flour (all purpose)
2.5 tsp baking powder
.5 tsp salt
1T sugar
1.25c heavy cream
Filling:
Strawberries (as little or as much as you like)
Sugar
Assembly
Whipped cream
Mix dry ingredients. Add the heavy cream and with a fork mix just until it all comes together (moistened).
With your hands bring it all together. Divide into 6 and shape into shortcakes (I take the cut piece and just go with my hands around it cradling it in my hands until its round).
You can brush some milk or heavy cream on top and sprinkle with some more sugar or just sprinkle with sugar like I did here.
Bake @ 450F for about 12 minutes or until lightly browned.
Strawberries
Wash, dry and slice your strawberries. Add some sugar (depending on how sweet you like it), mix and let sit for a while. I let mine sit for at least one hour or longer. Great to make ahead. Just put in the fridge and get them out when you need them.
The sugar will bring the juices out softening the strawberries and creating a delicious “sauce” at the same time.
Assembly:
Cut open one shortcake. Top the bottom half with strawberries and whipped cream. Add the top half of the shortcake. Voila, all done!

 Cilantro, Jalapeno, green onions … it’s Cornbread time! The Modern Baker
The spicy Jalapeno Cornbread one of the quick breads in “The Modern Baker” book inspired a Mexican dinner and it’s not even Cinco de Mayo yet.
Over dinner you could hear a lot of mhm, mhm, mhm’s especially from me. This stuff was good not just the cornbread but the entire meal.
I will be dreaming of Mexico tonight.
Spicy Jalapeno Cornbread
The Modern Baker
page 50
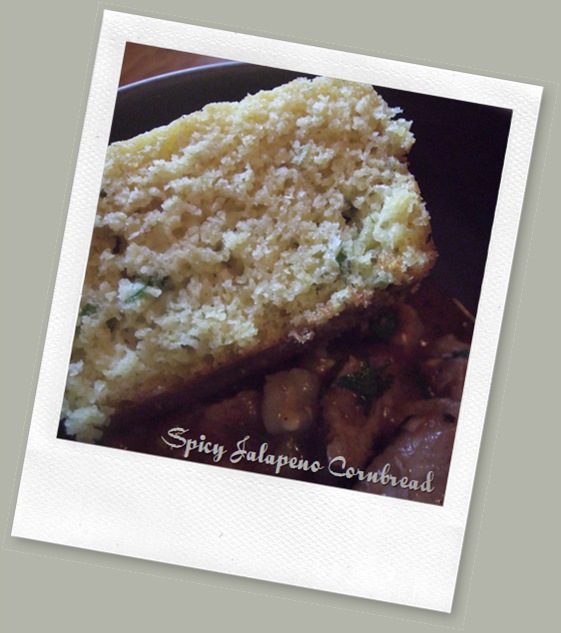
I really can get used to quick bread. I wonder why I have not made that many prior. They are so easy to put together and there is not much clean up afterwards.
As I read (yup, I actually read the recipe….ALL of it) I stumbled over the baking powder. Not literary but in the pages.
I don’t think I have ever read a recipe with 3.5 cups cornmeal/flour mixture that asks for 2 Tablespoons of baking powder. You read that right, 2T not 2 tsp.
I hesitated a little with actually putting that much baking powder into this recipe. I checked online to see if there was a printing mistake in the book. There are no updates on Nick Malgieri’s site and the Bakers from “The Modern Baker” challenge who made this bread already did not mention anything wrong with that much baking powder so I went ahead and did it. I added 2 T of baking powder, crossed my fingers and hoped for the best.
My biggest fear was that I would end up with a huge mess in my oven. Thankfully that did not happen and no new phobia was created. Good thing too, just imagine having to come up with a super cool name for that phobia.
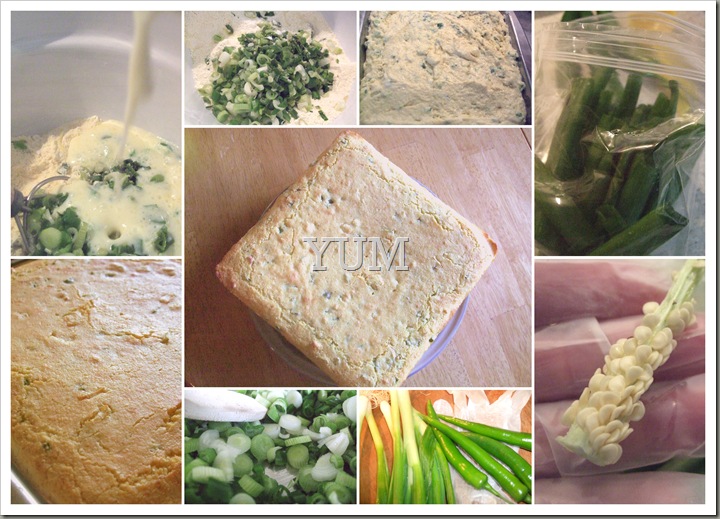 I could not find any Jalapeno peppers so I went with Thai peppers. Very hot but curiously not so in this bread. It turned out rather mild. Next time, and there will be a next time, I will add more.
See the disposable clove in the picture with the onions and peppers? See that membrane with the seeds right next to it? Those are hot and the oil in them will stay on your hands even after washing them.
Do yourself a favor and always wear disposable cloves when handling spicy peppers.
This recipe uses the white and some of the green parts of the onions. I Did cut part of the top parts off though and put them in the fridge. Don’t throw those away they make a nice ingredient for a veggie or chicken stock.
I keep them and freeze them if I don’t use them right away and get them out when I make stock.
The bread is baked at 375F for 30 minutes according to the recipe. Mine was done after 23 minutes. So please always use the time in a recipe as a “Guide”. Get to know your oven and adjust timing according to how your oven bakes.
This bread was fantastic. Moist, airy and delicious. I think this is the best cornbread I have ever eaten.
The 2T baking powder created a nice airy loaf. So much better then the dense ones I have usually eaten and created myself. YUM!
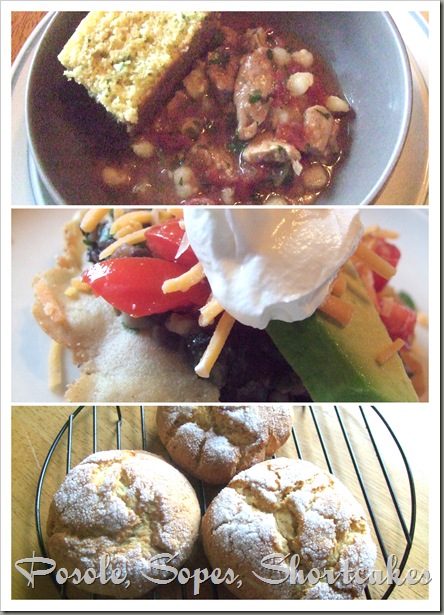
The Posole and Sope recipe came from the current Better Homes and Gardens Special Publications “Ultimate Mexican”. Both recipes are winners.
The Shortcakes where turned into Strawberry shortcakes. Recipe and pictures will follow.
The recipe for the Cornbread is in “The Modern Baker” book.
 more more more…..
got a stomach ache from all those sweet breads I have been posting about? If so don’t fear, I have a cure.
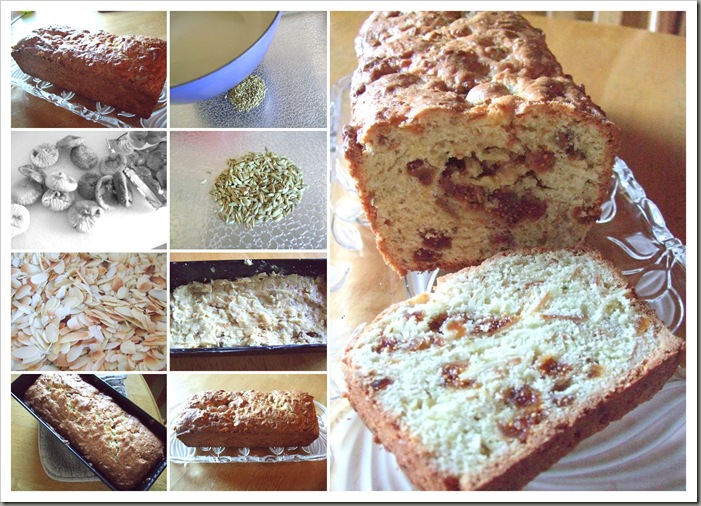
Fennel seeds help to eliminate stomach aches and stimulate digestion and figs are full of fiber, we just leave it at that.
So to cure your stomach ache just eat some of both in….sweet bread. Yup, I have another sweet bread for you. I am now convinced that you can not go wrong about getting “The Modern Baker” book.
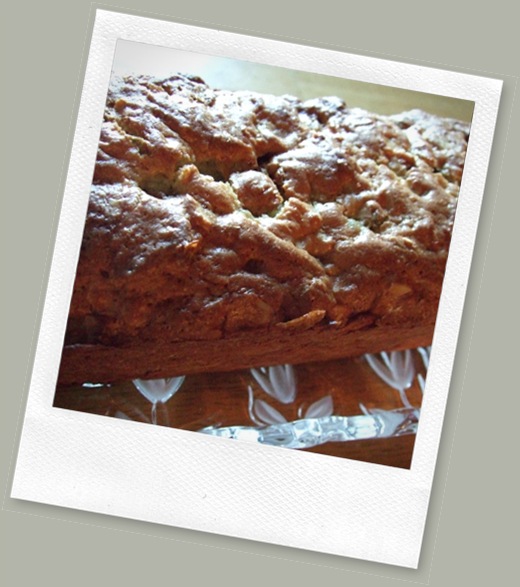
This sweet bread is another recipe from there and it’s another winner. Awesome in fact, the combination of figs and fennel seeds is just brilliant. I would never have thought of it. Yet the moment you bite into it and taste the combination you know they are a match that was meant to be.
This is the 4th of the quick breads in this book. There are some savory kind to follow so don’t worry.
So far each and every recipe was just great. No doubt about it those 4 alone are well worth the price.
In fact I would even go as far as saying this fig and fennel bread is worth the price of the book.
If you are still not convinced head on over to your local library and see if they have a copy or can get you one.
The Modern Baker
Fennel Fig & Almond Bread
page 42
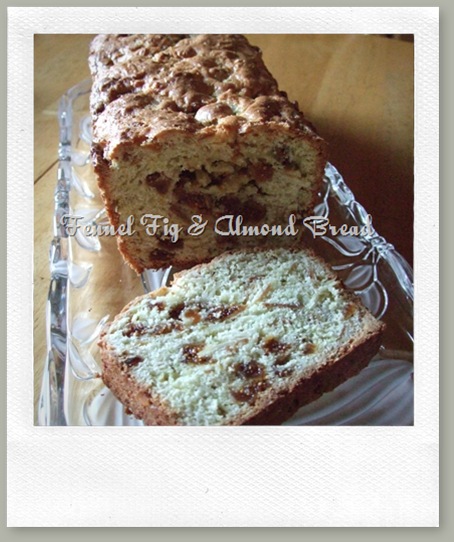 Like the other quick breads this recipe came together really quick and in my case all in one bowl. See, I really have to learn to read recipes before I make them and with that I mean the instructions not just the Ingredients list.
I became aware of my shortcomings when I read the Three clever Sisters blog about this bread. The blog talked about creaming the butter and bringing eggs to room temperature which I always do when I bake a Bundt cake or there like. However I did not read the instructions and simply melted the butter mixed it under the batter, added the eggs and than the rest.
Luckily the bread turned out fabulous and I will stick with this method from here on out.
So scratching my head as I read this blog and going ….what? I head over to the cookbook and read the instructions AFTER I baked the bread.
Sure enough …Never mind though because it did turn out great and no matter how much lighter it might have turned out had I beaten the ‘wahoozy’ out of that butter I am very happy with the outcome and maybe just maybe I have finally learned my lesson to read the instructions prior to baking.
One thing to point out is that mine only took 35 minutes to bake not 60 like stated in the book.
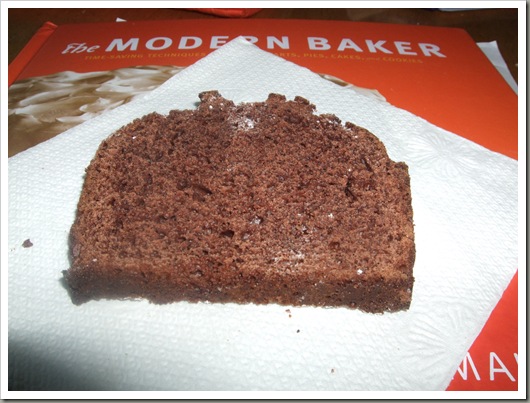
 Chocolate Spice Bread – The Modern Baker
Chocolate, Schokolade, cokolada…or however you say it in your part of the world it all means the same….a little bit of Heaven.
I have been working through the “quick bread” section of “The Modern Baker” book and when I saw this I had to make it right away. I love ‘me’ some chocolate and in a bread (or cake as we German like to call those sweet breads) it’s just as good as any other way.
This is the third recipe and this too did not leave me wanting.
It’s another great recipe. Even if it’s baked a tad to long. I checked every 5 minutes after the initial 30 and took it out at 45. That was 5 minutes to long however the bread was still very good. I will make this again for sure.
Love the spices (cinnamon, nutmeg and ginger) in this bread. The ginger is a real nice addition and you can really taste it.
If you don’t own a nutmeg grinder do yourself a favor and get yourself one. They are only a few dollars (mine was about 5 Euros) and so worth it.
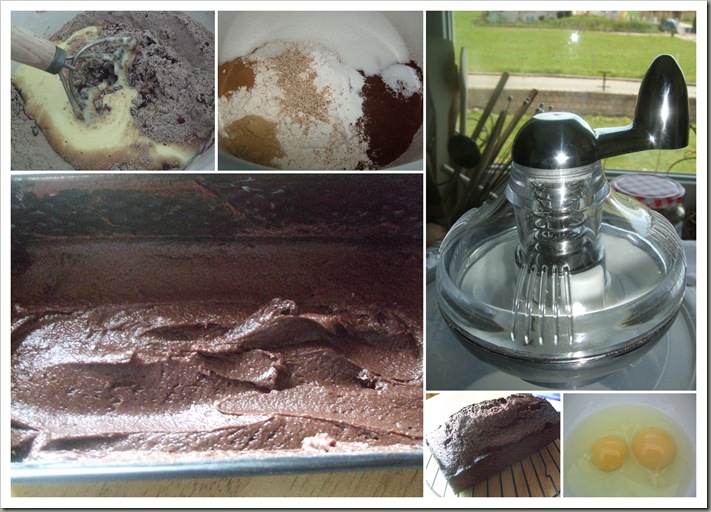 If you look at my egg pictures to the right you see that the yolk is quite different in size.
I get my eggs from a local farm in my small town and of course the hens don’t all lay the same size of eggs.
To get uniformed results in my baking I weigh my eggs to make sure I have the right “weight” for the large eggs required in a recipe. A large eggs weighs anywhere from 64-72g.
I also make my own brown sugar by simply adding some molasses to regular sugar. Here I did 1 tsp. I had no sour cream in the house and used quark (farmers cheese but a strained yogurt would do too) instead.
I had my doubt that this bread would rise enough to fill the pan. My pan was barely 2/3 full yet it did rise above the pan. Great tasting bread that would taste especially good with your afternoon coffee.
I will be serving this during the Thanksgiving/Christmas season. 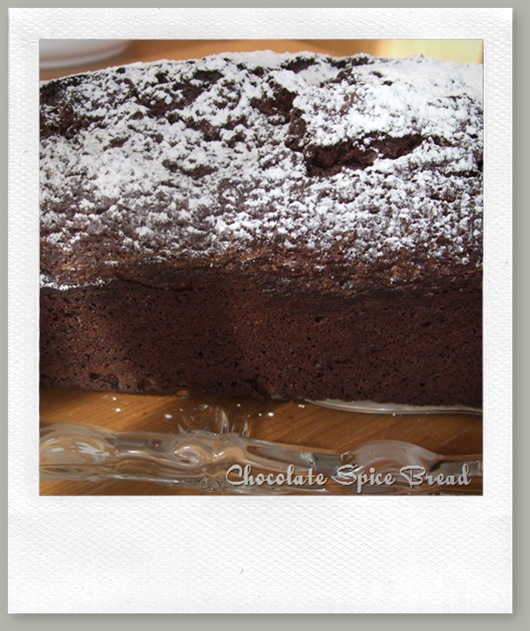
Recipe
The Modern Baker
page 45
This quick bread is packed with chocolate flavor. Avoid overbaking, which could dry it out. To serve, cut the bread into thin slices and accompany with preserves or marmalade. Raspberry preserves and ginger marmalade are especially good with it.
Keep the bread under a cake dome or loosely wrapped in plastic wrap if you are serving it the same day it is made. Wrap in plastic wrap and aluminum foil to keep at room temperature for up to 4 days; wrap well and freeze for longer storage.
Makes one 8 1/2-inch loaf (12 to 16 slices)
Ingredients:
- 5 tablespoons unsalted butter, melted, plus more for greasing the pan
- 1 1/2 cups flour (spoon flour into a dry-measure cup and level off)
- 1/3 cup cocoa powder (Dutch-process or alkalized), sifted after measuring
- 1 teaspoon baking powder
- 1/2 teaspoon salt
- 1/2 teaspoon ground cinnamon
- 1/2 teaspoon freshly grated nutmeg
- 1/2 teaspoon ground ginger
- 2 large eggs
- 1/2 cup sugar
- 1/3 cup packed dark brown sugar
- 2/3 cup low-fat or regular sour cream
Directions:
Lightly grease an 8 1/2-by-4 1/2-by-2 3/4-inch loaf pan with a little unsalted butter, then line the bottom of the pan with parchment or wax paper cut to fit; butter the paper as well.Position a rack in the middle level of the oven; preheat to 350 degrees.
Combine the flour, cocoa, baking powder, salt and spices in a bowl or on a large piece of parchment or wax paper.
Whisk the eggs in a large bowl to break them up, then whisk in both sugars. Whisk for a minute, or until the mixture lightens, then whisk in the 5 tablespoons of butter and the sour cream.
Add the flour mixture to the egg mixture all at once; gently whisk until smooth.
Scrape the batter into the prepared pan and smooth out the top, pushing the batter evenly into the corners. Bake on the middle oven rack for 35 to 40 minutes, until the bread has risen and a toothpick or a narrow-bladed knife inserted into the center of the bread emerges clean.
Transfer the pan to a wire rack to cool for 5 minutes, then unmold the bread and let it cool completely on the rack. When ready to serve, transfer to a cutting board.
 Preserving last Falls harvest
I especially missed Zwetschgen (similar to a plum, small, oval and the pit releases easily) while living overseas. You don’t know how much something means to you until it’s gone and gone it was for many years while I lived away from Germany.
Now we are to move overseas again but this time I will take part of what’s near and dear to me with me and that’s “Zwetschgenmus” (plum jam).
I got thinking since it’s Earth Day today I will do some canning. See using your own fruits and preserving them is something you can do to help Mother Earth.
How come you ask? I see it first of all as using what you have instead of buying more. You don’t have to go out every time you need a jar of jam and considering where those jams often come from (half around the world or across the huge USA) preventing fossil fuels to be wasted in that process.
Another reason to me is that I know how that fruit grew. There where no pesticides or chemical fertilizers used which protects the environment especially our pollinators. My last reason is that I don’t end up with jars and jars of those store bought jams that will either go into a landfill or in a recycling center to do “who knows what” with them. I use reusable twist off glasses that are sold here for just that reason, Jam making.
Two nights ago I got out a couple gallon size bags full of Zwetschgen from the freezer and while I was at it the rest of the rhubarb as well.
I defrosted them overnight in the fridge. The next day I weight them and added half that weight in 2x1 Jam Sugar.
Zwetschgen have enough pectin so they would do fine on their own with just the same amount of sugar and maybe a little lemon juice and a slow cook to thicken it. So if you want to try Jam’n, can’t get Jam sugar and have no access to pectin go that route.
After mixing the fruit with the sugar I let it stand for at least one hour (this time I put them in the fridge overnight) three is better before I make Jam. This will give the sugar time to pull out the juice from the fruit.
When I am ready to “Jam” I make sure that I have everything I need on hand and ready to go. That means clean Jars (a cycle in the dishwasher would be perfect) and lids. For Jam making I use Twist off Jars and the open Kettle method.
I know that the USDA is against this method even for fruits (maybe for fear of lawsuits) but this method has been used forever here in Germany and other parts of the world especially for fruit. If you use this method you do it at your own risk and make sure you have enough acid in the fruits or veggies that you can. To be save just add a little lemon juice. I use this method only for Jams and relishes/chutneys. For all other veggies, fruits, meat (chicken broth, cooked/browned hamburger or cooked sausage only nothing raw) I use the hot water bath method.
In case you are a Food preserver and use a pressure canner (I know this is the only method the USDA approves) great. I just want to add that pressure canners are unknown here in Germany. We do use pressure cookers for cooking but pressure canners are not available here.
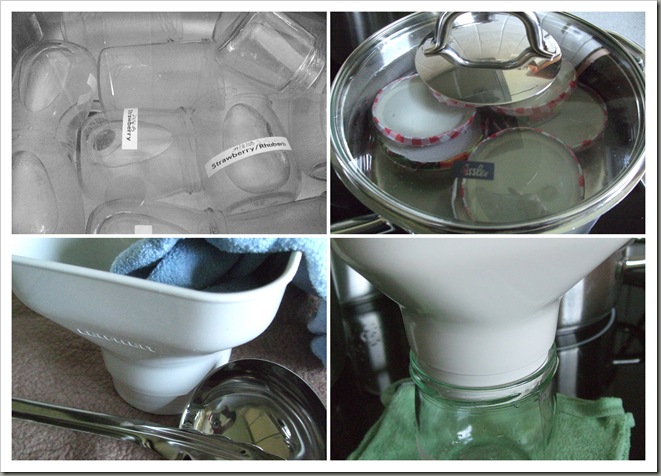
I keep my jars and lids in very hot water until I need them. To avoid that the jars burst when I fill them with the boiling jam I place the jar on a wet hot rag.
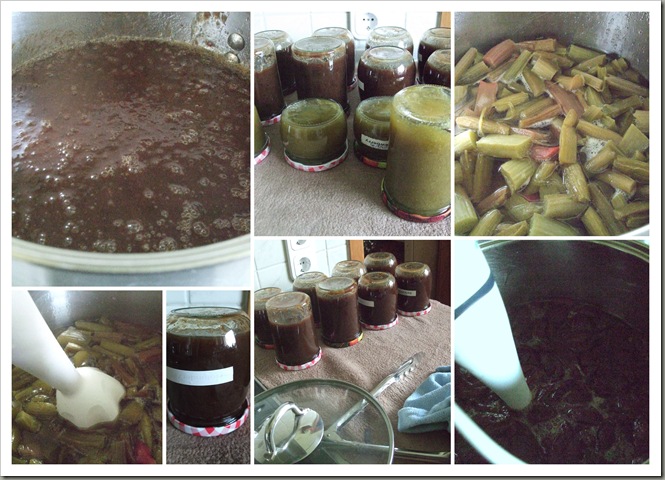 For the Zwetschgen Jam I used cinnamon and real vanilla (scrape out the pods) to spice it up. The left over pods I place in a jar and fill it with sugar. Just shake it a few times and a few days later you have homemade vanilla sugar. Much better than artificial vanilla flavor or even real vanilla flavor.
 Vanilla works very well with Zwetschgen/Plum. After I fill the jar I close the lid and place it upside down on a hot wet towel. Before closing the jar I wipe off the top of the jar to make sure no jam is stuck there.
I leave the jars on the wet towel until they are cooled off. The vacuum that is created will keep these jars for a long time (at least three years in our house).
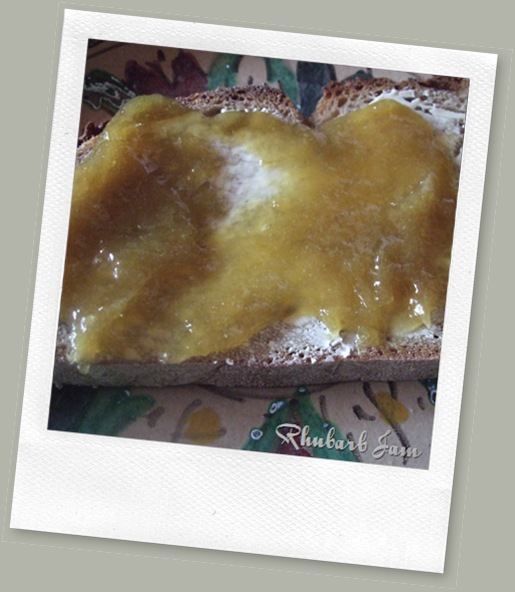
The rhubarb jam I made is just rhubarb and Jam sugar and nothing else added. If you have never “Jam’d” before why not give it a try with some strawberries or other fruits in season depending where you live. In our area that would be rhubarb. I heard California is already knee deep into strawberries. Yum!
Happy Yam’n and Happy Earth Day!
 Are you ready for some Dates? –The Modern Baker-
If you are looking for me to hook you up, that’s not happening. I just say it as it is.
Though the types of Dates I’m talking about are a love connection made in Heaven too.
I first fell in love with Dates when we where living in Jeddah, KSA. My favorite time to eat Dates are when they are still green, tangy and leave a numb feeling in your mouth (see picture in the link above). Unripe not ripe that’s the way I like them.
Now don’t get me wrong, I like them ripe and sweet too and while living in the Kingdom often thought of Eve who is rumored to rest in Jeddah and the forbidden fruit in the Garden of Eden.
Could it be that a simple Date is what did us all in? So sweet, so melt in the mouth like and yet so simple?
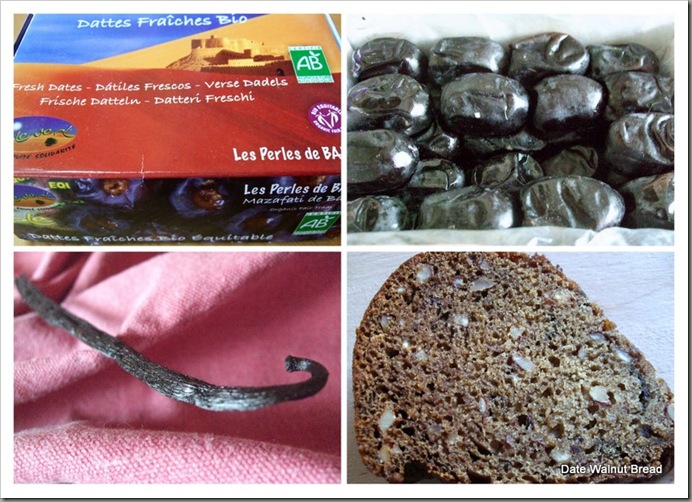
I was reminded of how much I like Dates when I picked up an Iranian box of fresh Dates at the “Slow food” Messe (Exhibition) in Stuttgart last Friday.
There is no comparison to what you might get in a Grocery store. None what so ever. These where so fresh and ripe and sweet and ….(I could just go on and on) that it was a little bit of Heaven right here on Earth.
When I found this little treasure at the Exhibition I was so excited. I had just received my copy of The Modern Baker Thursday night and while flipping through the book The Date Walnut Bread on page 47 caught my eye. I knew that this was one of the first recipes out of this book that I wanted to make.
Now I had the main star in my hands and not even the missing Walnuts could stand between this woman and her Date Walnut Hazelnut Bread.
This is the second recipe that I baked from the Quick Bread section of “The Modern Baker” book.
To find out how others like this bread and others from “The Modern Baker” book you can read all about it here.
I will not post the recipe here since I will be blogging about all the recipes in the book over the next year or so and it would not be fair to the author to have all the recipes online in one place. However this recipe is very close to the one in the book.
This is the second recipe I baked from this book and I must say I am very much looking forward to the next recipe. Both this and the Cocoa Banana Muffins (Cupcake) are excellent and well worth alone getting the book.
Date Hazelnut Bread
The Modern Baker
Page 47
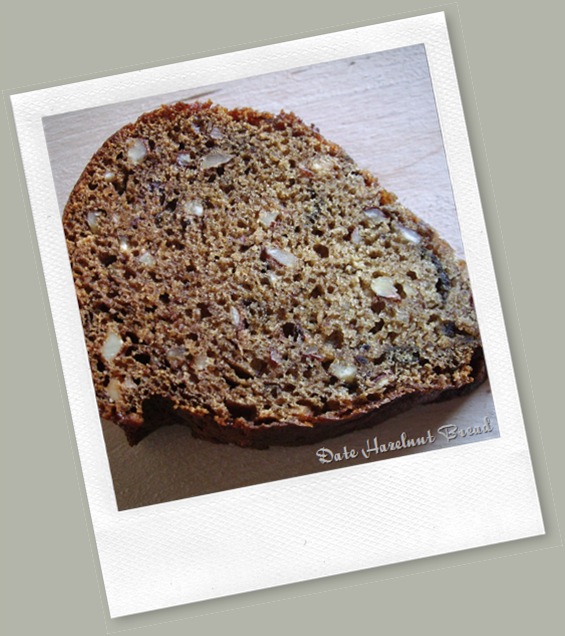
This bread came together very quick. That is if you forget about the hour long wait to soak the Dates in some Water and a bit of Butter.
By the time the hour was over my Dates had nearly disappeared. I was left with pretty much a thick syrup.
What surprised me with this recipe is how “friendly” this recipe actually is.
Only 1T of Butter (that’s all the fat that’s added), no milk just water, 2 eggs and 1.5 c sugar in addition to the dates (a lot), nuts and the dry ingredients. Not bad at all for a sweet treat.
The little snag I talked about earlier is that I had no Walnuts in the house but I always have Hazelnut here. Therefore I used Hazelnut and about 1/4 c of Almonds instead of the Walnut.
I am not a big fan of Vanilla flavor so I used real Vanilla and 1 tsp. of Rum instead.
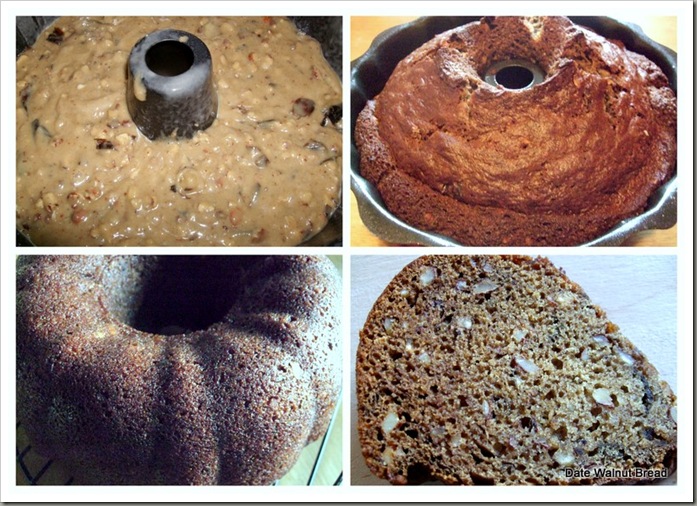
As for the taste? Can you say Y.U.M?
 “Bread baking Day…
the monthly event for passionate and to-be bread bakers” is what I read on Zorra's "1x umrühren bitte" (stir it 1x please) blog.
Hmh, is she talking to me? I am passionate (just ask my family) and I am a “getting there” bread baker.
Now that we got that out of the way I think she is indeed talking to me.
A quick read into the rules “Make sure you got the monthly bbd theme, post your recipe by the specified deadline and email the host with a link to your entry.” has me looking for this month theme.
This month theme is hosted by Cathy from The Bread Experience.
Cathy is also baking in the HBin5 challenge where I first read about Bread baking Day. On Cathy’s webpage I found what I was looking for.
Bread in Pots is the theme.
How perfect is that? I can’t garden this spring. We will be moving back to the states in June and we have to return the garden back to it’s original state (Grass).
With Spring finally here I miss that part of Year when the Garden comes to live and I get down and dirty.
I so enjoy the sound of this challenge.
Another thing I will miss in just a couple of month is canning my strawberries, rhubarb and cherries. Canning is another one of those things I enjoy doing.
The rules for this month challenge stated that any type of pot could be used.“Any kind of pot will do: flower pots, ceramic pots/bakers, clay pots, baking tins, casserole dishes, Dutch ovens, etc. If you have a pot or tin and can bake bread in it, then go for it!”
I got thinking, why not combine two of my passions (canning and baking) for this challenge.
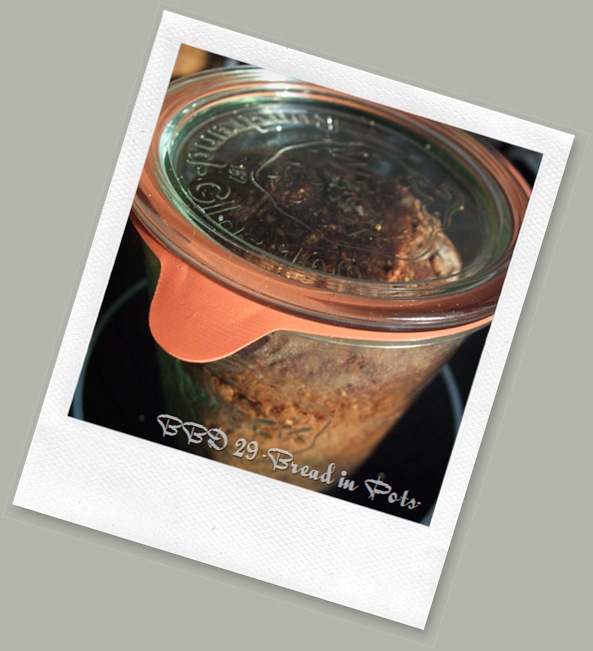
My pot will be a .5l Weck canning jar and yes, I preserved the bread I baked in it!I found the original recipe here and changed it just a little.
It turned out great. I will be making this bread again many times in the future.
If you are a camper or live in an area where power outages are normal during cold weather or simply enjoy a filled pantry you might want to preserve some of this bread yourself to have on hand.
BBD # 29
Schwarzbrot im Glas (Pumpernickel style bread in a jar)
Ingredients:
.5l Buttermilk (about 2 cups)
4.5 tsp instant yeast (2 packets)
100g Molasses (dark syrup)
250g Coarse Rye Meal - coarsest granulation
250g Coarse Whole Wheat Meal
125g Medium coarse Whole Wheat Meal
125g All purpose or spelt flour
100g Quark (farmers cheese, strained yogurt, sour cream)
150g Sunflower seeds (I leave those out, soak them prior to using to plump them up)
50g Sesame seeds
50g crushed flax seed
2 tsp salt
For this recipe I used some rye and red wheat and ground it using a mill to my liking.
For the coarse meals I set it to the coarsest setting and for the medium (see picture) i set it half way in between fine and coarse.
If you don’t have a mill use a kitchen machine and just pulse it a few time until the kernels have broken up some. This bread would be great with even some of the kernels left whole and just soaked prior to making the dough.
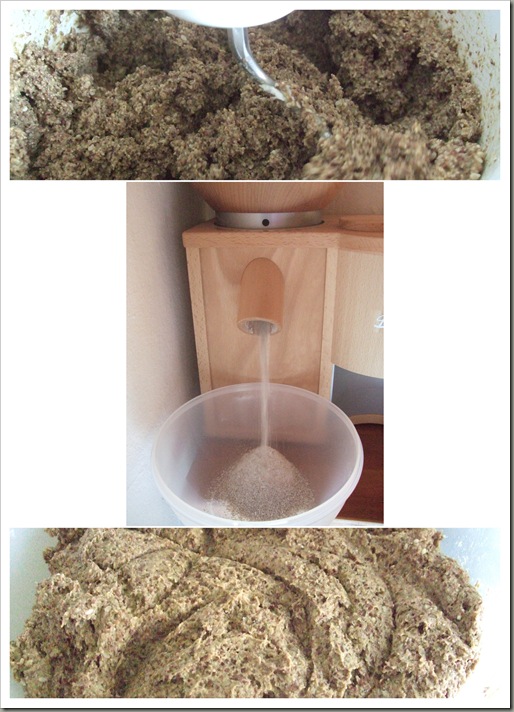 I warmed up the buttermilk a little and added the molasses to solve it.
Mix all the dry ingredients together and mix with the buttermilk/molasses mixture.
Knead it for about 5 minutes. Use more buttermilk if needed or if you grind your own meal. You will end up with a stiff but tacky dough.
Cover and let the dough rest for 60 minutes
Butter your jars and fill them half (up to 2/3) with batter.
I divided the dough into 5 pieces, and formed each into a round, placed it into the jar and pressed just a little.

The recipe talked about baking them with closed lids but at 150C I feel this would create some gooey rubber after the bake (If you are using metal lids with rubber gaskets you might want to give it a try and close them right away, fixing them with a metal band). I baked my jars at 150C (300F) for 90 minutes. I will reduce that to 70 minutes next time. Depending on the size of your jar this might be longer or shorter. The original recipe mentioned 2.5 hours but they did have the lids closed.
As soon as you remove the jars from the oven top them with your lids and close them (I left my rubber caskets in a pot of hot water). If you are using American style jars place your metal lid on the jar now and fix with a metal band.
As the jars cool down a vacuum is created sealing the jars. I made some cakes last fall using this method and they are still good to eat and sealed perfectly. 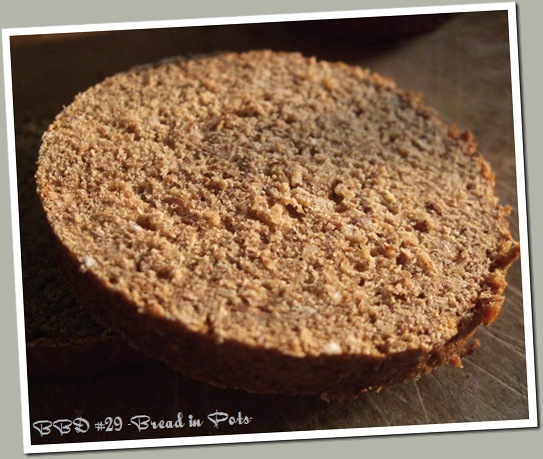
Jars
I used 5x half liter Weck jars. The recipe talked about 2x 1.5 liter jars so if you have some you could use those too. For US bakers that would be 3x quart jars.
 The Modern Baker: another challenge begins…
Hello, my name is Petra and I am an addict, a cookbook addict to be exact.
Especially baking books are dear to my heart and I enjoy adding them to my growing collection.
I might need an intervention in the future but until then I will happily find new reasons to expand my collection.
I would say the new baking challenge: “The modern Baker” hosted by Phil would count as a good enough reason.
Yup, I thought you might agree so I went ahead and ordered the book from Big Dog Trading company. It was under ten dollars and even with shipping still $10 less than with Amazon direct. I sure love a bargain as much as I love cook books.
The only downside on ordering with affiliates of Amazon is the fact that most of them ship surface which means it takes weeks for it to get to me here in Germany (APO address). Amazon on the other side only takes about a week.
My book did not arrive in time for the challenge to start the beginning of April. That does not really matter though since the first part of the challenge (Quick Breads) will be stretched over 3 month so there is time to make all 15 by the end of June.
Since we will be leaving Germany this summer I will attempt to get the “Quick Breads” done by the end of May when our Household goods will be shipped out.
The First bread I choose actually chose itself.
A glance to my banana bowl showed the need for quick action.
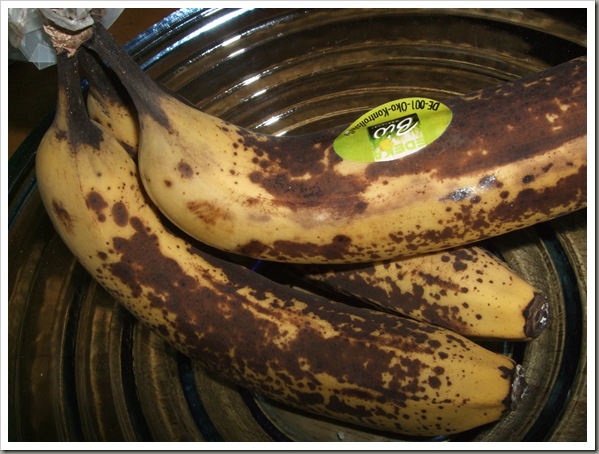 Since I will be baking through the entire book during this challenge I will not post any recipes out of this book as a courtesy to the author unless I find them on the internet. With this one you are in luck. The author himself posted it here.
Looking through the book I found many recipes I am excited about trying so I feel the $10 are well worth the price.
If you are unsure or if money is tight see if your local library has a copy, can order a copy from another branch or even purchase a copy for your branch. Happy Baking!
Cocoa Banana Muffins
page 60 The Modern Baker by Nick Malgieri
http://food.gather.com/viewArticle.action?articleId=281474977502905
Makes 16 standard muffins
1 1/2 cups all-purpose flour (spoon flour into dry-measure cup and level off)
2/3 cup alkalized (Dutch process) cocoa powder, sifted after measuring
1 teaspoon baking soda
1/2 teaspoon salt
3 medium bananas, peeled and mashed with a fork to make 1 1/2 cups
1/2 cup sour cream
12 tablespoons (1 1/2 sticks) unsalted butter, softened
1 cup granulated sugar
1/2 cup light brown sugar
3 large eggs
Two 12-cavity muffin pans with 8 paper liners in each
- Set a rack in the middle level of the oven and preheat to 350 degrees
- Combine the flour, cocoa, baking soda, and salt in a mixing bowl and stir well to mix.
- In a separate bowl, stir together the mashed bananas and sour cream; set aside.
- Combine the butter, sugar, and brown sugar in the bowl of an electric mixer and place on mixer fitted with the paddle attachment. Beat on medium speed for about a minute, or until well mixed and a little lightened in color.
- Beat in the eggs one at a time, beating smooth after each addition.
- Decrease the mixer speed to low and beat in half the flour mixture. Stop the mixer and use a large rubber spatula to scrape down the bowl and beater.
- On low speed, beat in the banana mixture. After the batter has absorbed the banana mixture, beat in the remaining flour mixture.
- Stop and scrape down the bowl and beater again.
- Remove the bowl from the mixer and use a large rubber spatula to give a final mixing to the batter.
- Divide the batter equally among the paper-lined cavities in the muffin pans.
- Bake the muffins for about 30 minutes, or until they are well risen and feel firm to the touch. Because this is such a liquid batter, test a muffin with a toothpick or the point if a thin-bladed knife – it should emerge with just a few moist crumbs clinging to it.
- Cool the muffins in the pan on a rack.
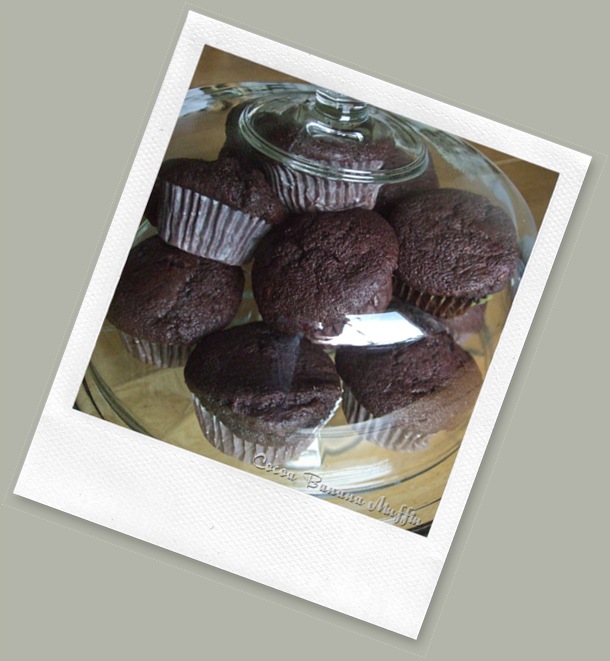
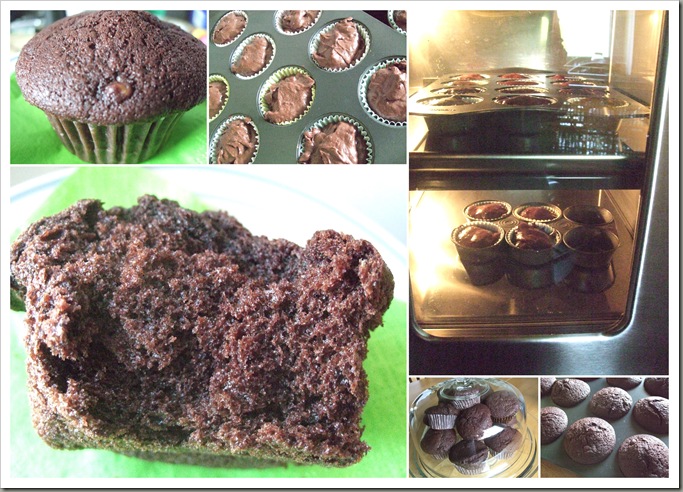
With 3 Bananas and 2/3c Dutch processed cocoa powder in this recipe I knew I would be in for a great treat. My worries that this might be to sweet (1 1/2 c sugar) where swept away with the first bite. Yum, is what I was thinking as I devoured it.
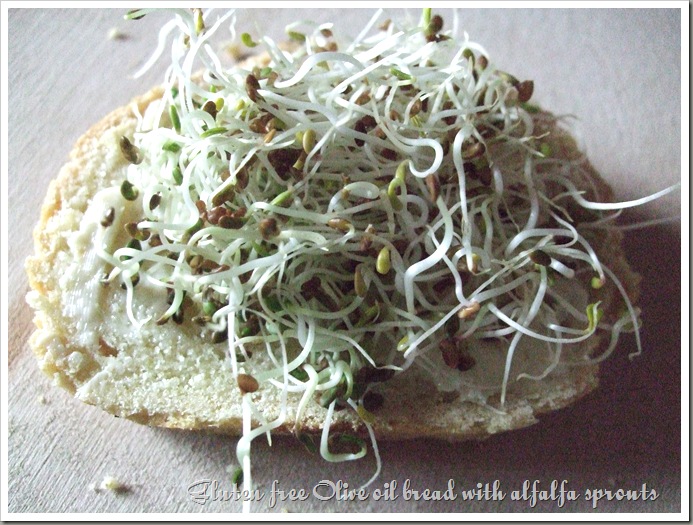
 Another reason to be thankful for your daily bread!…7 HBin5 –Gluten-Free Olive Oil Bread
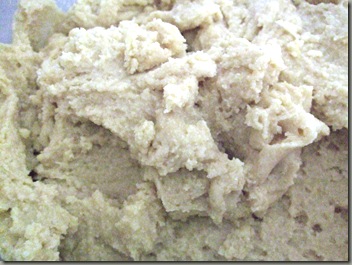
In my head they will remain since I can’t bring myself to actually pull the dough out again and as time passes I am more and more reluctant to give it a go. Usually time has a healing propriety but sadly that was not the case with this dough.
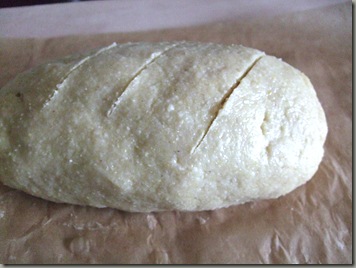
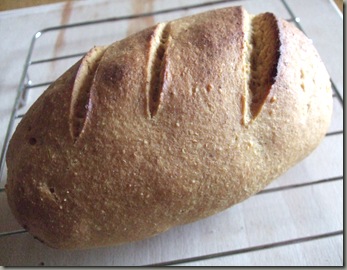
When I first made it I was repelled by the smell of the dough which was unpleasant. It did not rise that much during it’s resting period and was very heavy for it’s size after it was baked.
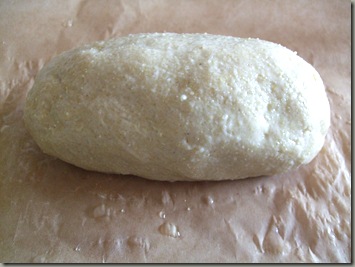
It came out looking beautiful and was “ok” to eat. Most of it however did end up in the trashcan and I am afraid the rest of the dough will follow that is if I can force myself to pull it out of the fridge.
Maybe it will become a “fuzzy” new pet. In that case I would have to name it. Can’t have any pet remain nameless now can we?
I need some help with that process though since I am really bad with naming things. Any ideas?
April 15th Bread Braid
1 full recipe of Gluten-Free Olive Oil Bread
Page 238-239 – 1 loaf of Gluten-free Olive Oil Brad
Changes:
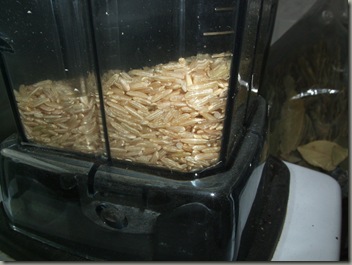
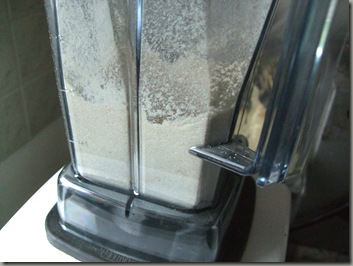
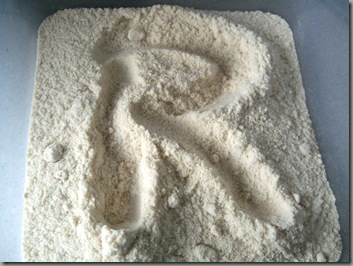
I did grind brown rice to make my own flour using the vitamix
For the tapioca I ground some minute tapioca
Used chickpea (Gram) flour instead of soy flour
Instead of cornstarch I used potato starch (had that in the house but not enough cornstarch)
I used carob (locust bean, Johannisbrot) instead of xanthan gum



Now head on over to Michelle’s blog Big black dog and see how the rest of the group used up this dough and what they thought of it.
Not everyone’s taste buds are the same and what I like you might despise and what I don’t like you might love so give it a try and judge for yourself.
If you are in fact Gluten intolerant this might even be the bread for you.
Category
- Bread (1)
- Bread Pudding (1)
- Bundt Cake (1)
- Cake (1)
- Canning (2)
- Cheese (5)
- crackers (2)
- Easter (1)
- Flatbreads / Pizza (1)
- HBin5-No Knead (18)
- Make your own (4)
- Mellow Bakers (1)
- Pasta (2)
- Pie (3)
- Quick Breads (5)
- Rolls and such (1)
- Rye (1)
- Sandwich Bread (1)
- Schwarzbrot (1)
- Sheet cake (3)
- Sheet cake w/yeast (2)
- snacks (1)
- Sourdough (2)
- Sweet breads (1)
- The Modern Baker (11)
- Yogurt (2)

Blog Archive
-
▼
2010
(58)
-
▼
April
(18)
- A little trip to India…
- Milk and Honey Raisin Bread…8 Hbin5
- Pumpkin Pie Brioche Cinnamon Crescent Rolls….8 HBin5
- Real Welsh Scones one never stops learning
- Rustic Bread ala Hamelman –Mellow Bakers-
- Strawberry Shortcakes a perfect ending to a delici...
- Cilantro, Jalapeno, green onions … it’s Cornbread ...
- more more more…..
- Chocolate Spice Bread – The Modern Baker
- Preserving last Falls harvest
- Are you ready for some Dates? –The Modern Baker-
- “Bread baking Day…
- The Modern Baker: another challenge begins…
- Another reason to be thankful for your daily bread...
- Easter breads…
- Other uses for a dehydrator and how bread plays a ...
- French toast breakfast……6 HBin5 – Carrot bread -
- What do you do when sleep will not find you?…6 HBi...
-
▼
April
(18)

